
Odoo Gmail Connector Odoo Gmail Connector
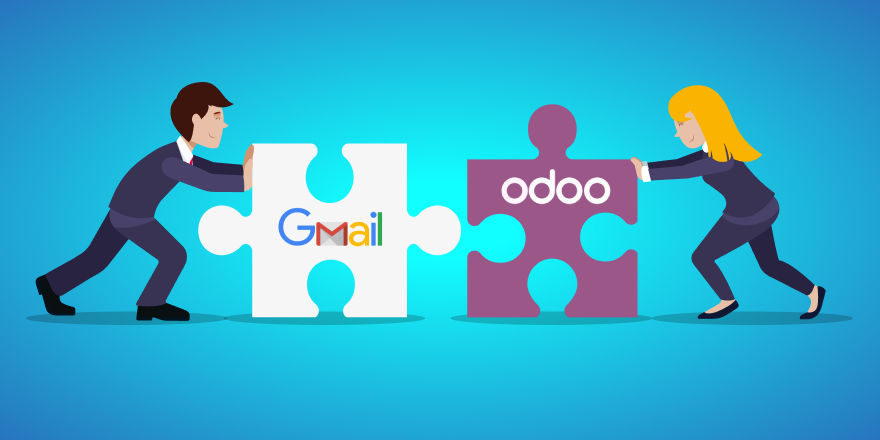
Sync all your Google mails in your Odoo account without any hassle by using the Ksolves Gmail Connector! This integration allows you to manage emails and data efficiently within Odoo. Experience a more efficient and connected business environment by getting started with it today!


Simplify Your Workflow:
Integrate Gmail with Odoo for
Ultimate Efficiency!
Simplify Your Workflow:
Integrate Gmail with Odoo for
Ultimate Efficiency!
Now you don't need to juggle between Gmail and Odoo! Just login to your Odoo account and get all your Gmail within your Odoo environment. Set up our application just once, and use Gmail for sending and receiving emails within your Odoo environment. This makes it simple to handle your emails and data all in one place, which saves time and improves your workflow. Start using it now for a smoother and more connected business experience!
Key Features

Send Feature
With Odoo Gmail app, emails can be sent exclusively from the currently logged-in user's email address and are automatically synchronized with their Gmail "Sent" folder. This email functionality offers three convenient ways for sending messages.
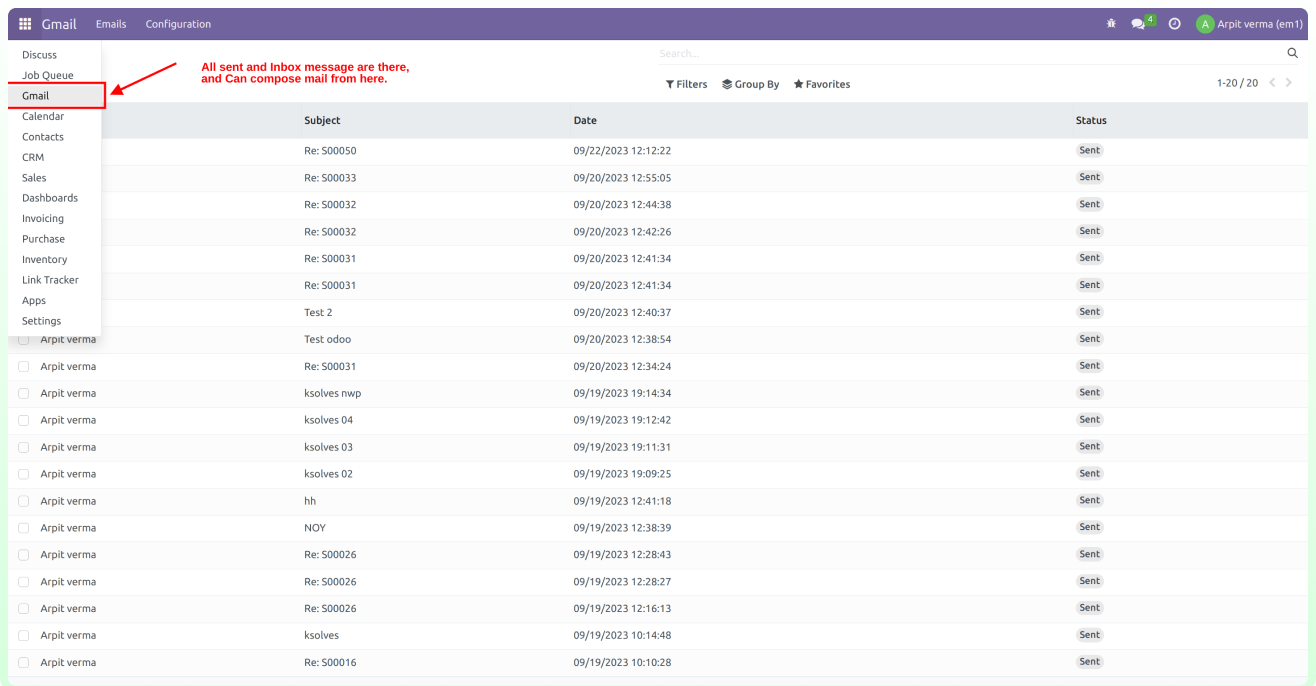
Users can send emails directly from various modules such as Sales, Purchase, and Contacts. This feature streamlines communication related to specific records.
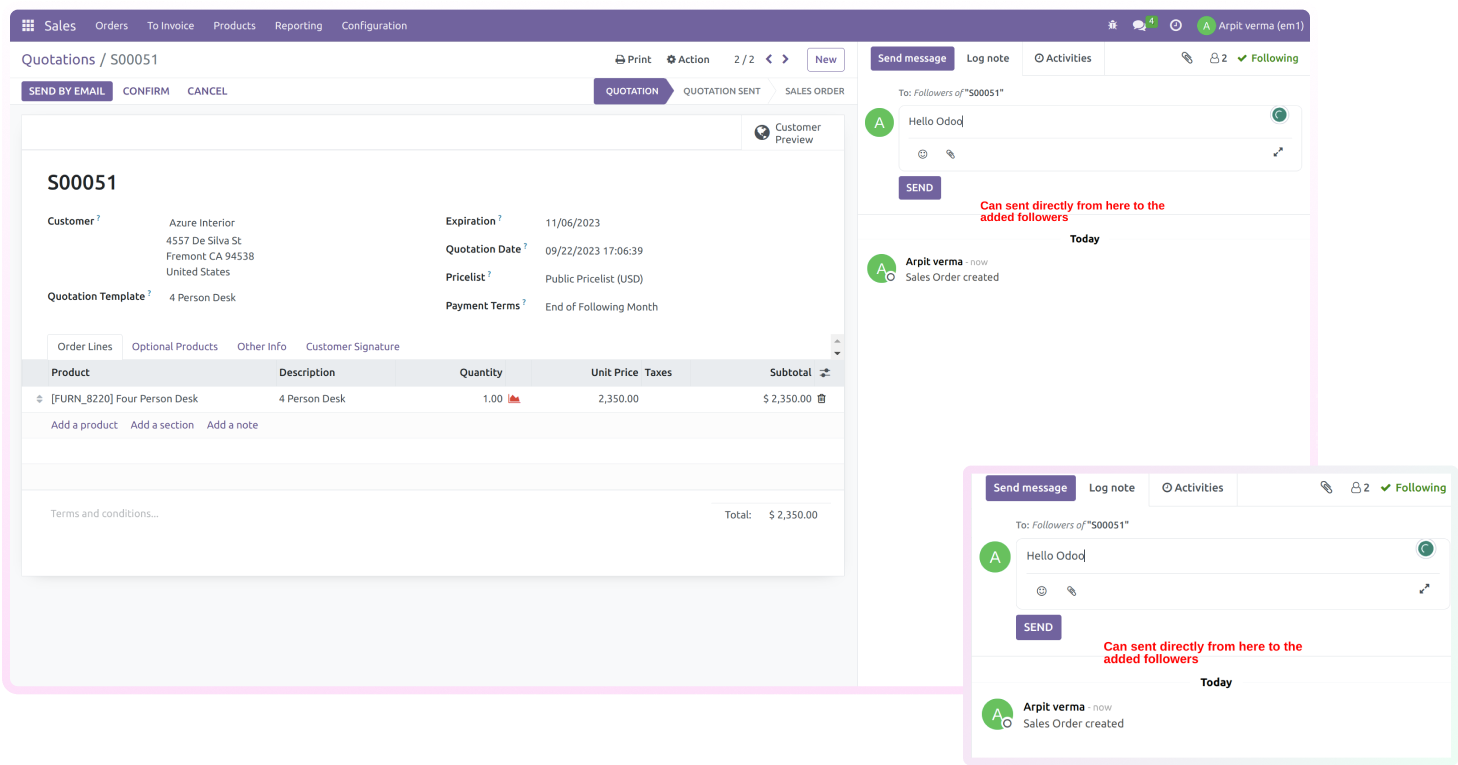
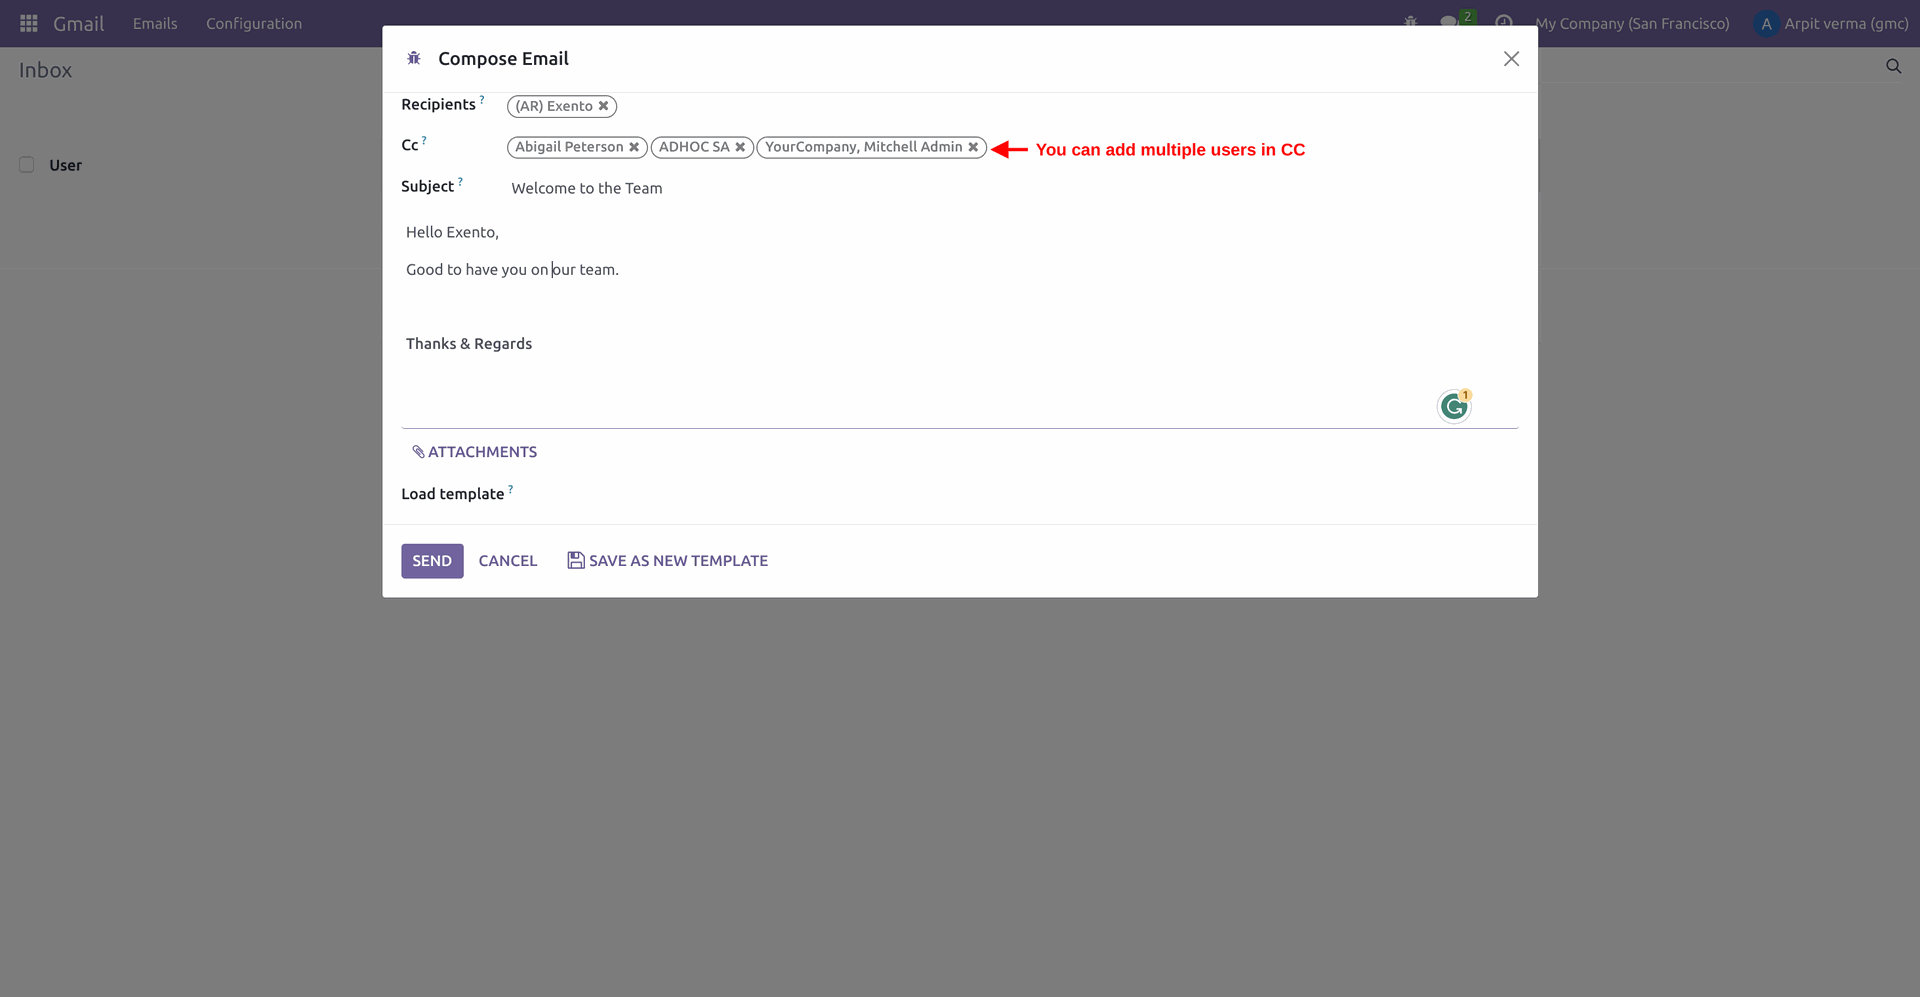
Integrated a user-friendly compose menu within Odoo Gmail, that allows users to draft and send emails with ease.

Receive Mail Feature
There are two different ways to receive mails:
synchronization of emails received in Google Gmail with Odoo.

Gmail Filter Feature
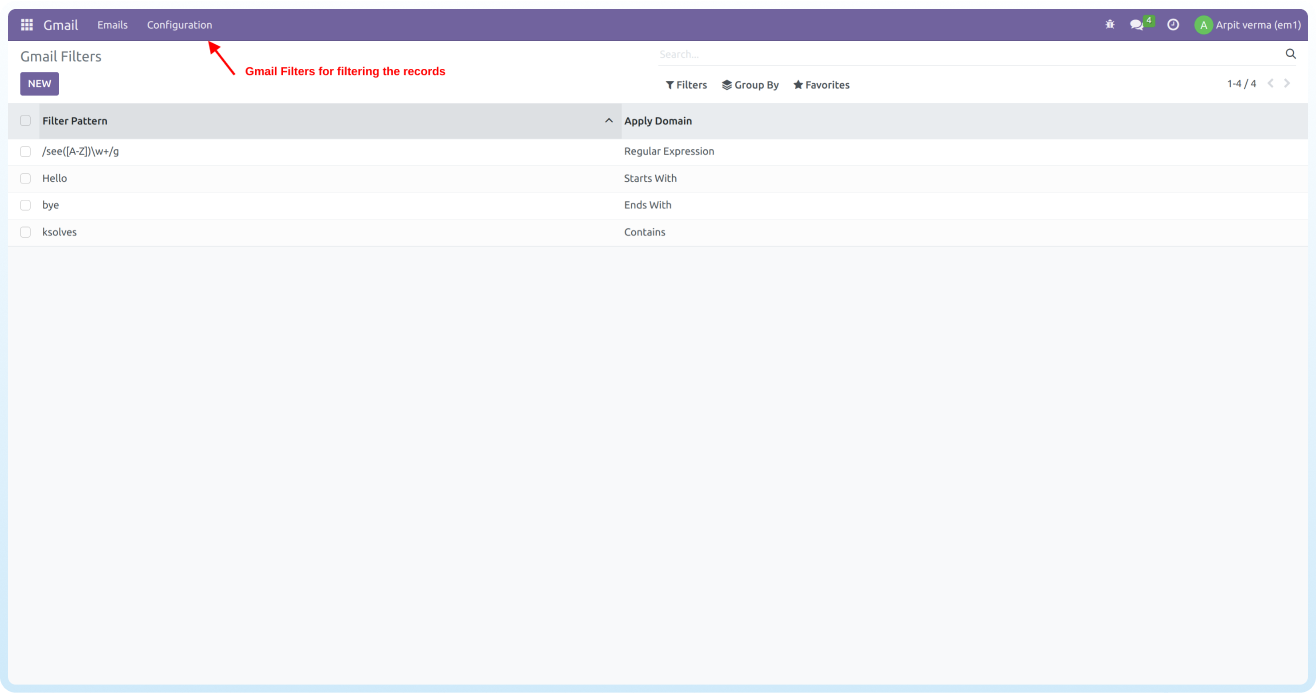
Gmail Filters serve the purpose of filtering the records of incoming and outgoing emails based on specific criteria, such as keywords like 'Ksolves' found in the subject line of sent and received emails. These filters can be categorized into four distinct types.

Gmail Aliases Feature
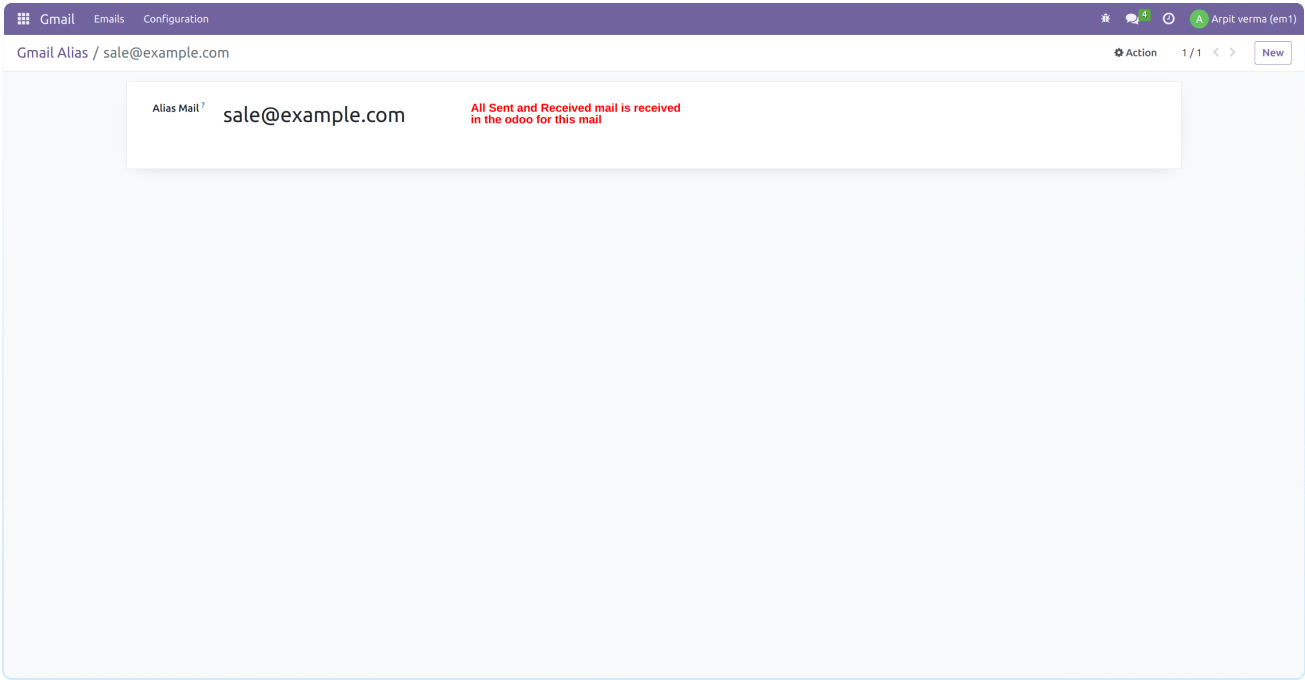
When a user configures an email address as an alias, all emails sent or received using that alias will be automatically synchronized with Odoo.
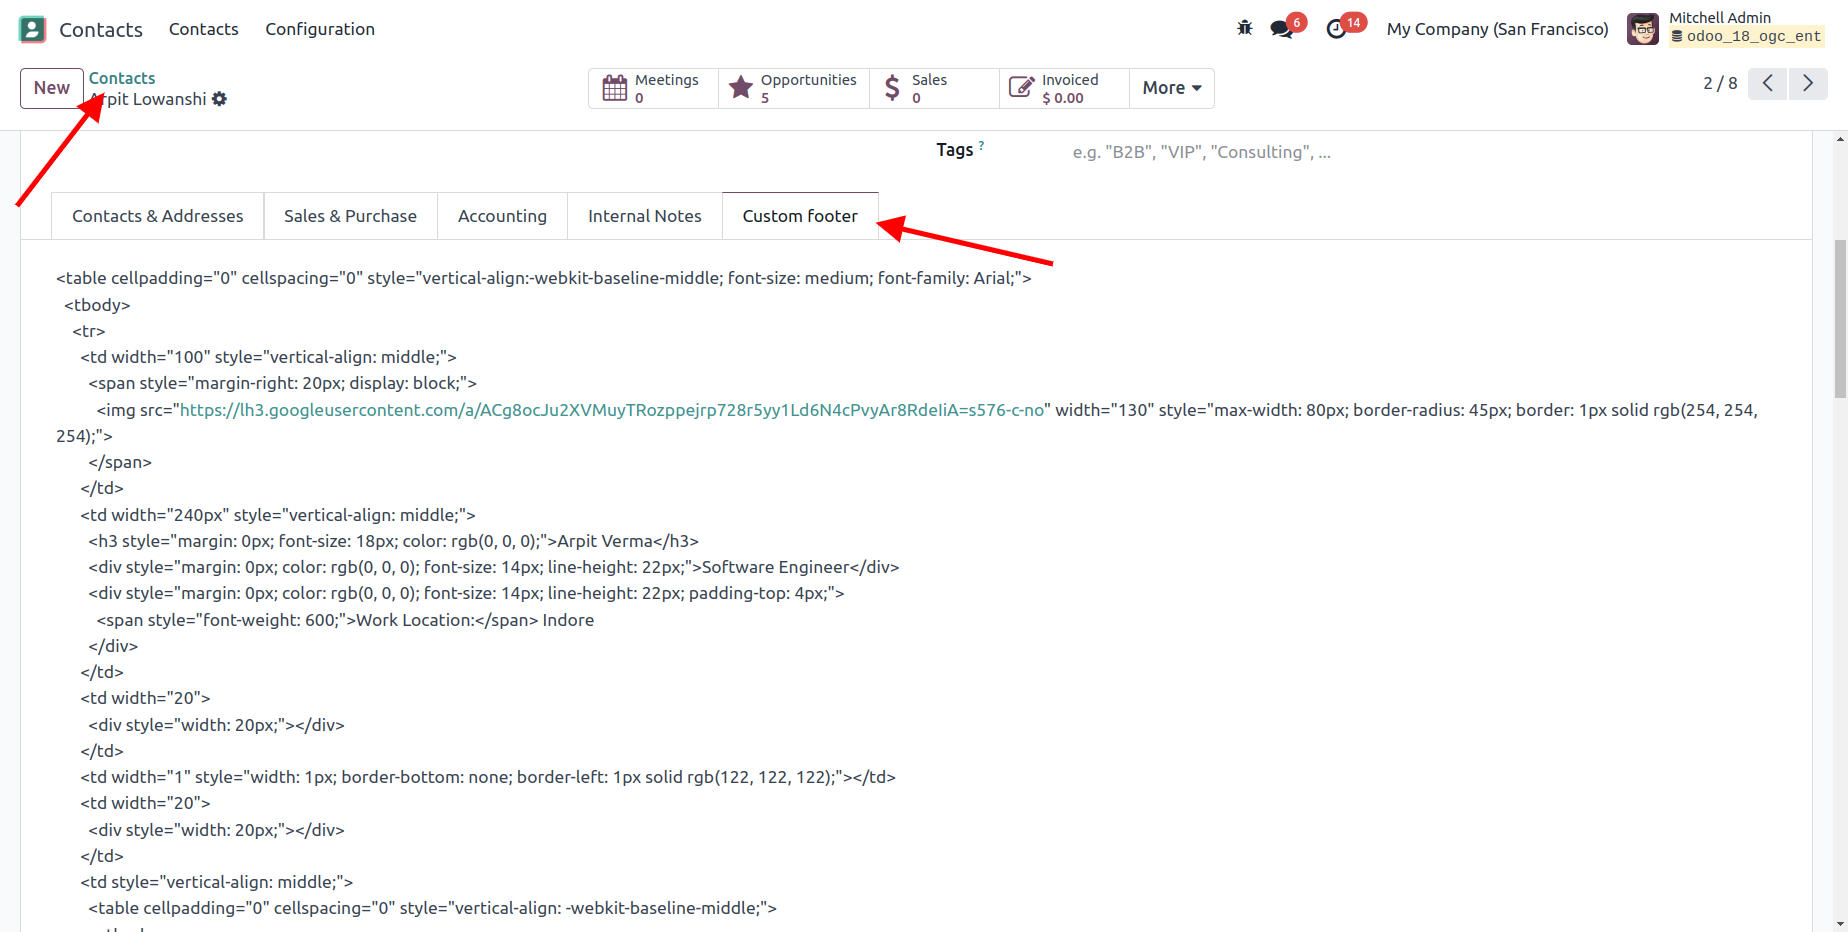
Custom Footer Feature
This feature allows you to add custom footers to your email templates for individual contacts. The footer is automatically included when the email is sent, providing a personalized touch for each recipient.
Email Security Feature
Users can access only their email records
Sent Email will be shown in the Sent Menu.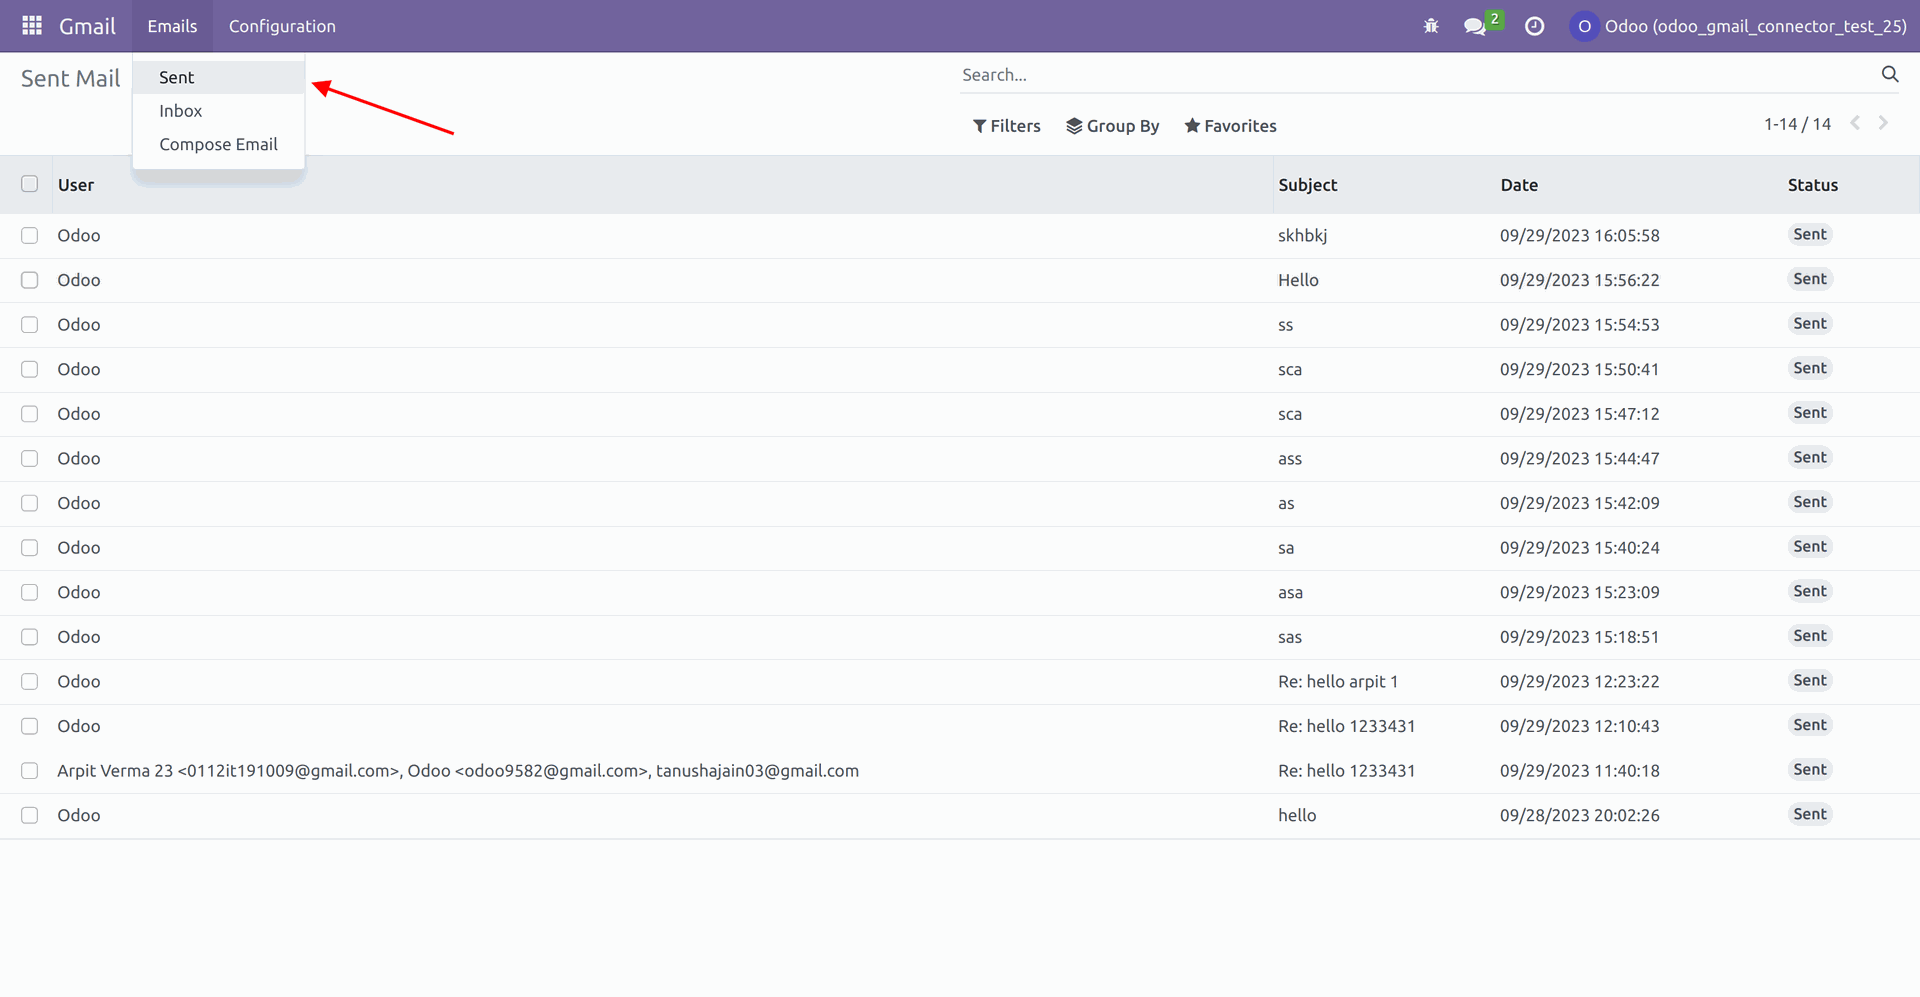
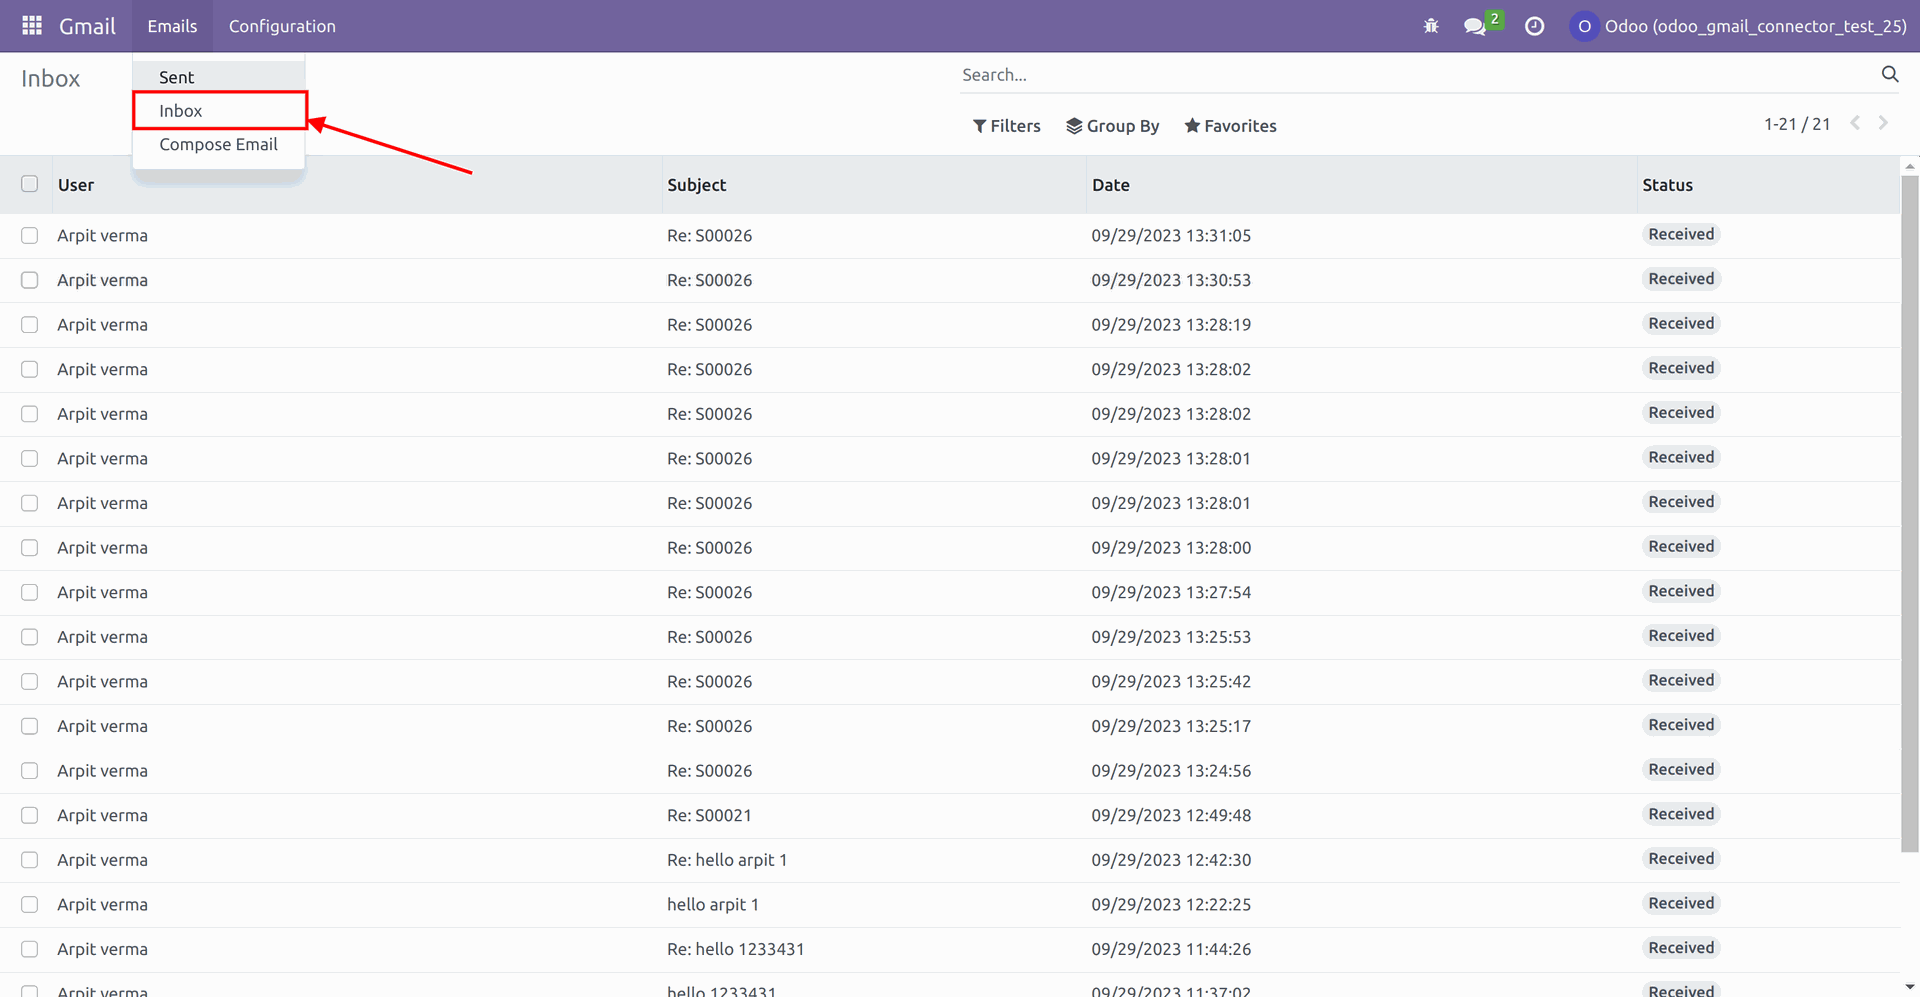
Received Email will be shown in the Inbox Menu.
Setup

Google Application Setup
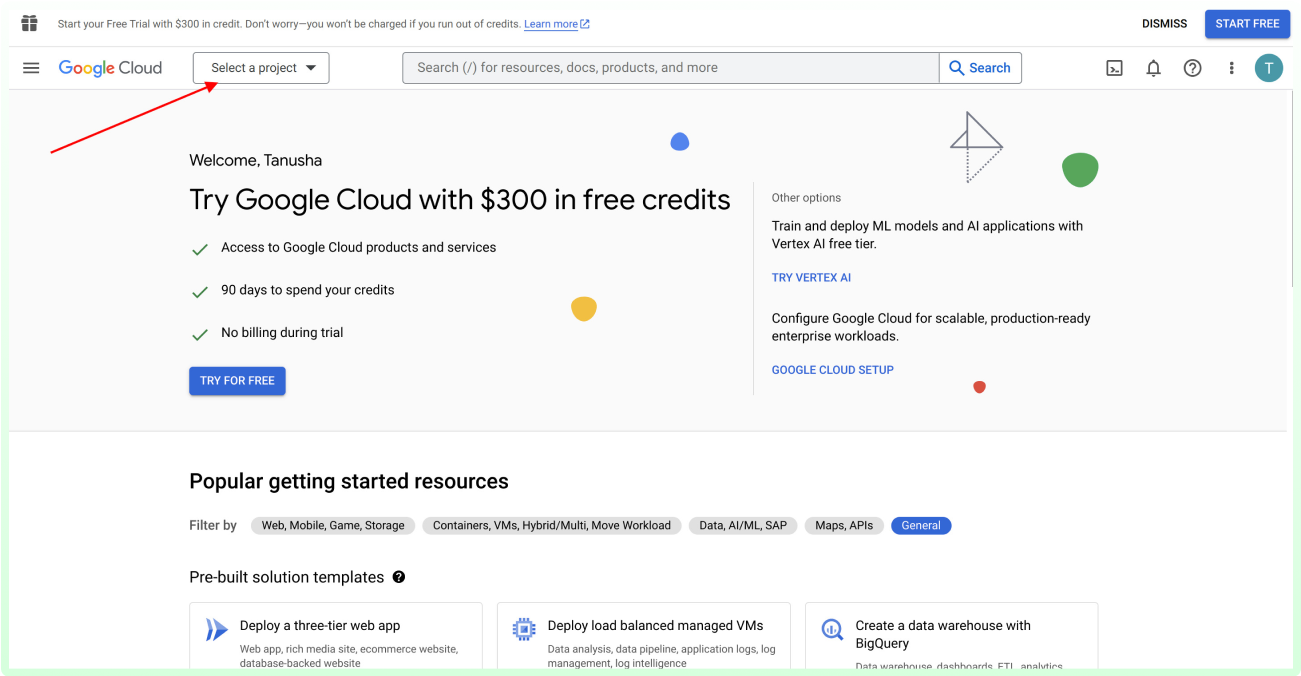
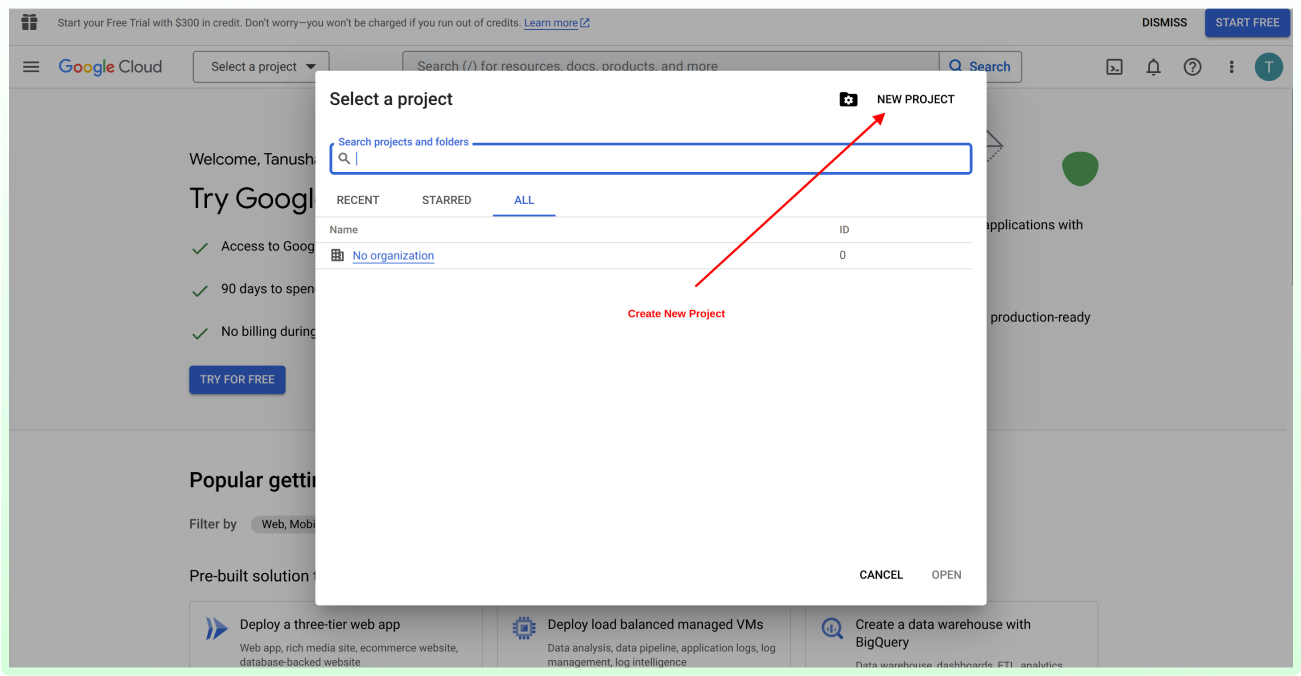
Step 1: Go to https://console.cloud.google.com/ and click on the select project.
Step 2: After that, create a new project.
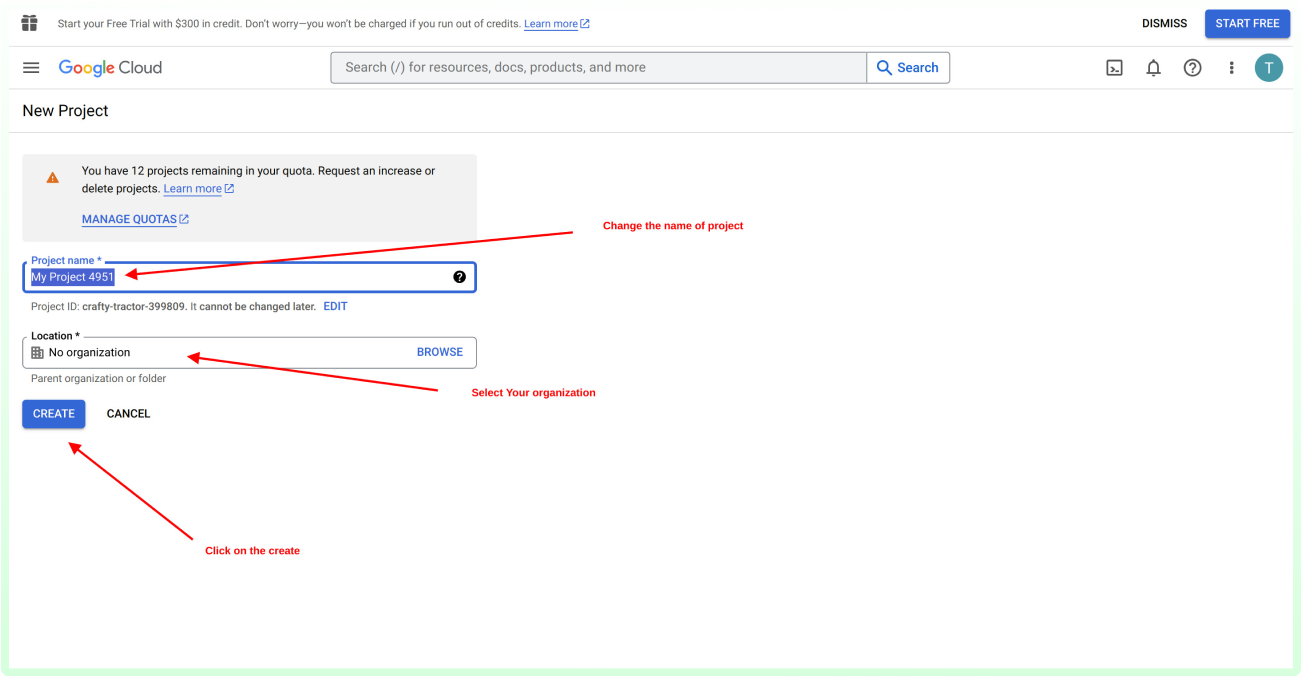
Step 3: Change the project name according to the organization requirements and choose your organization.
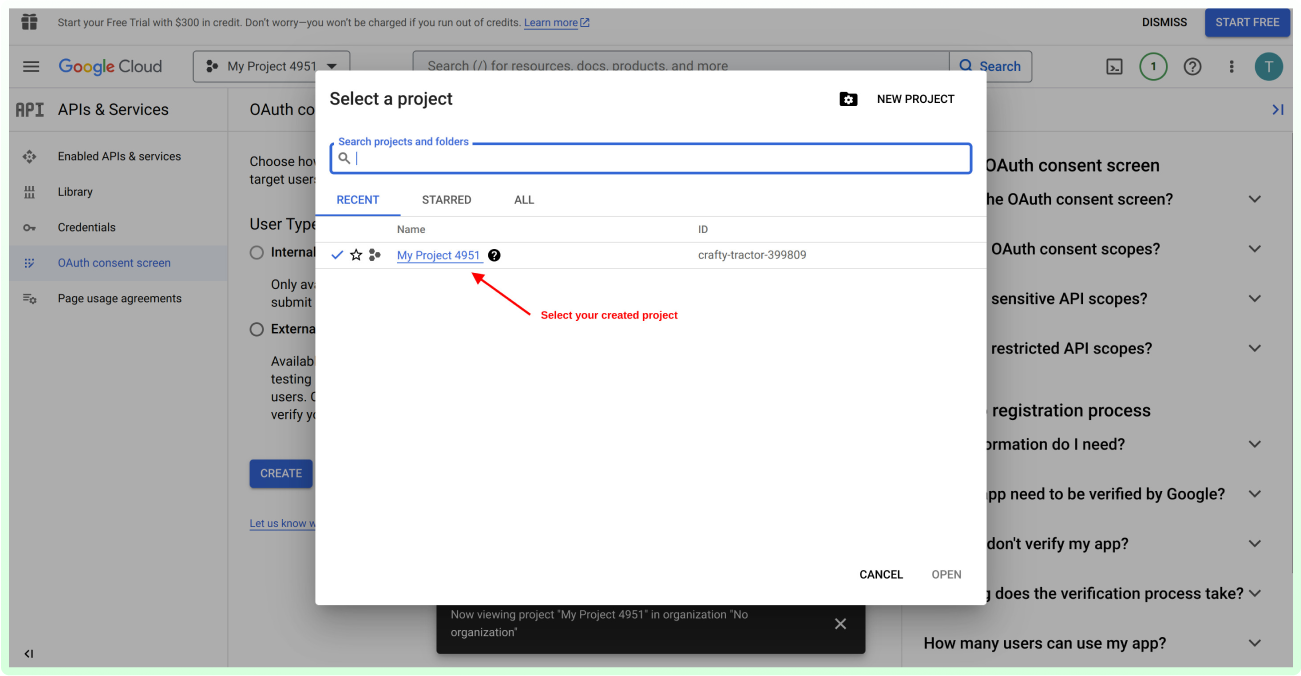
Step 4: Once the project is created, select that project.
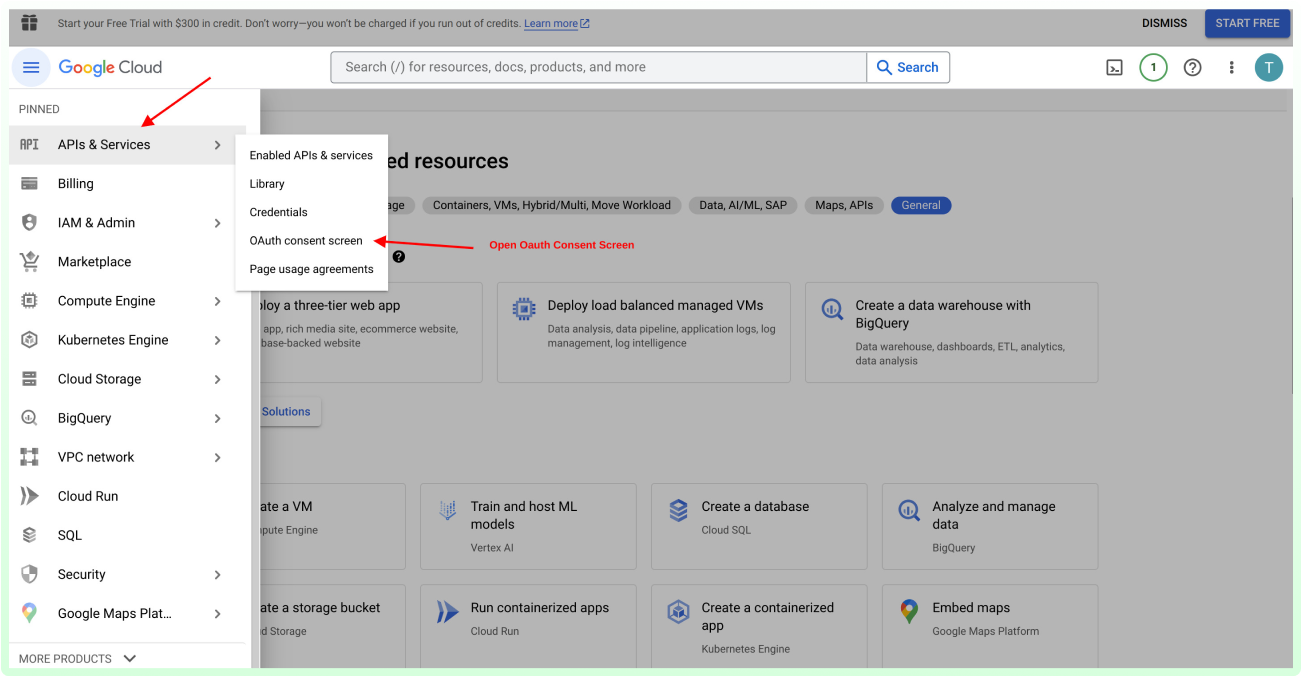
Step 5: Open OAuth consent screen.
Step 6: Create the consent screen; choose the internal type.
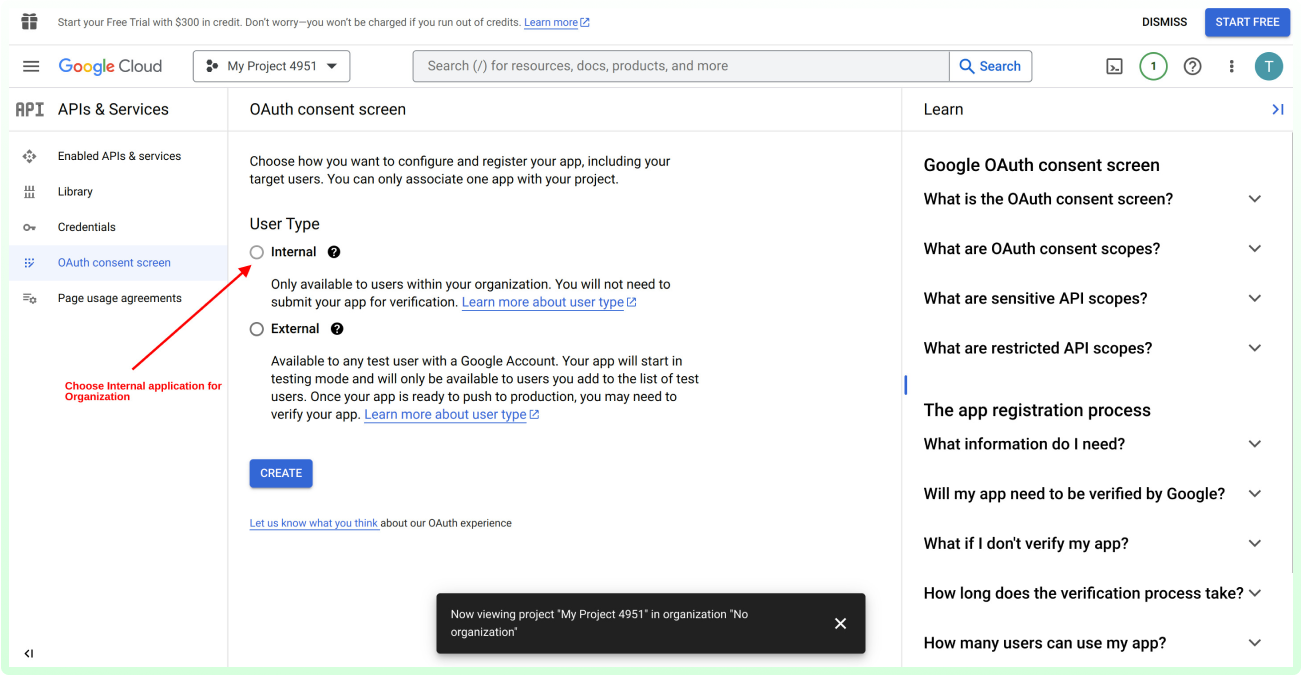
Step 7: Go to the credentials menu, select the credentials button, and choose OAuth client ID.
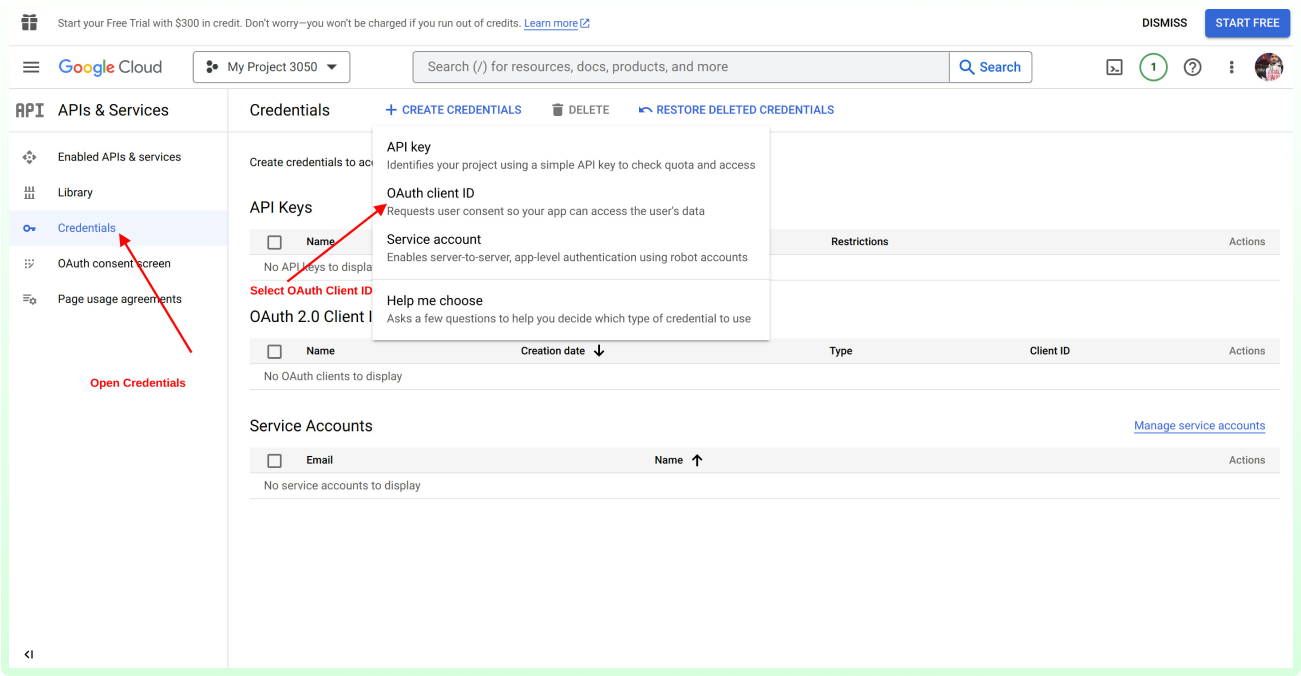
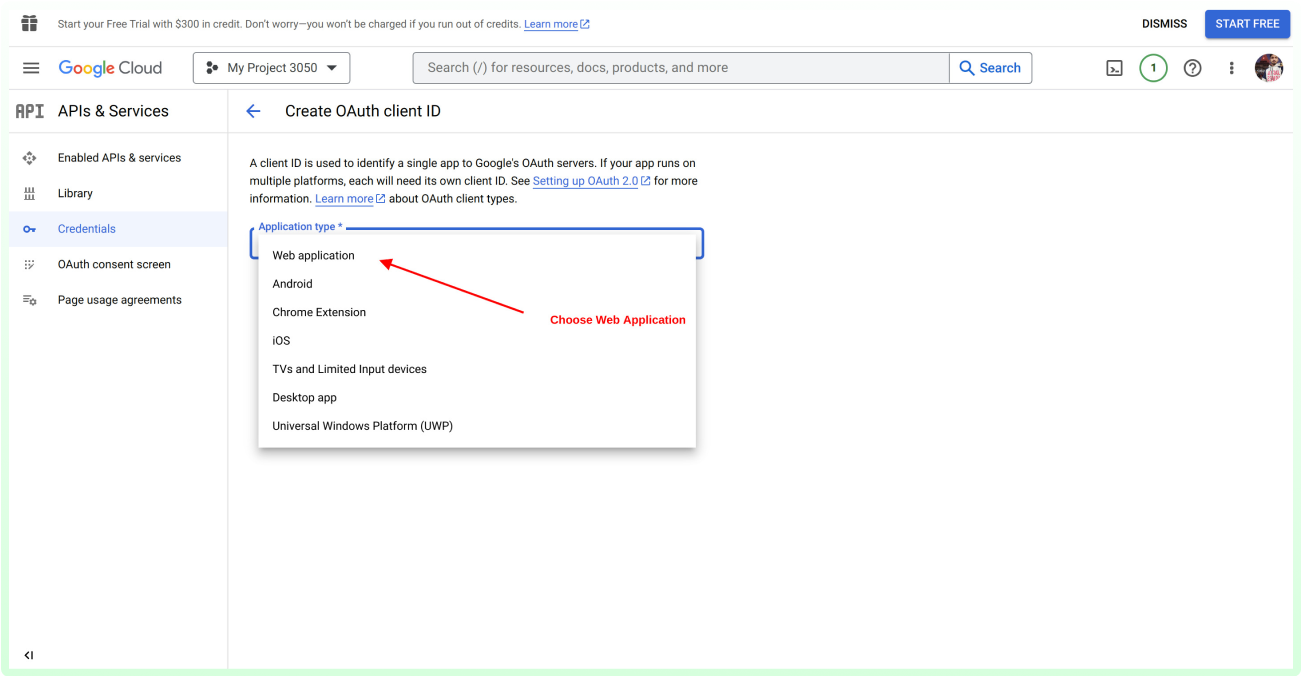
Step 8: Next, Choose Web Application.
Step 9: Enter your website URL, it gives access to your profile login.
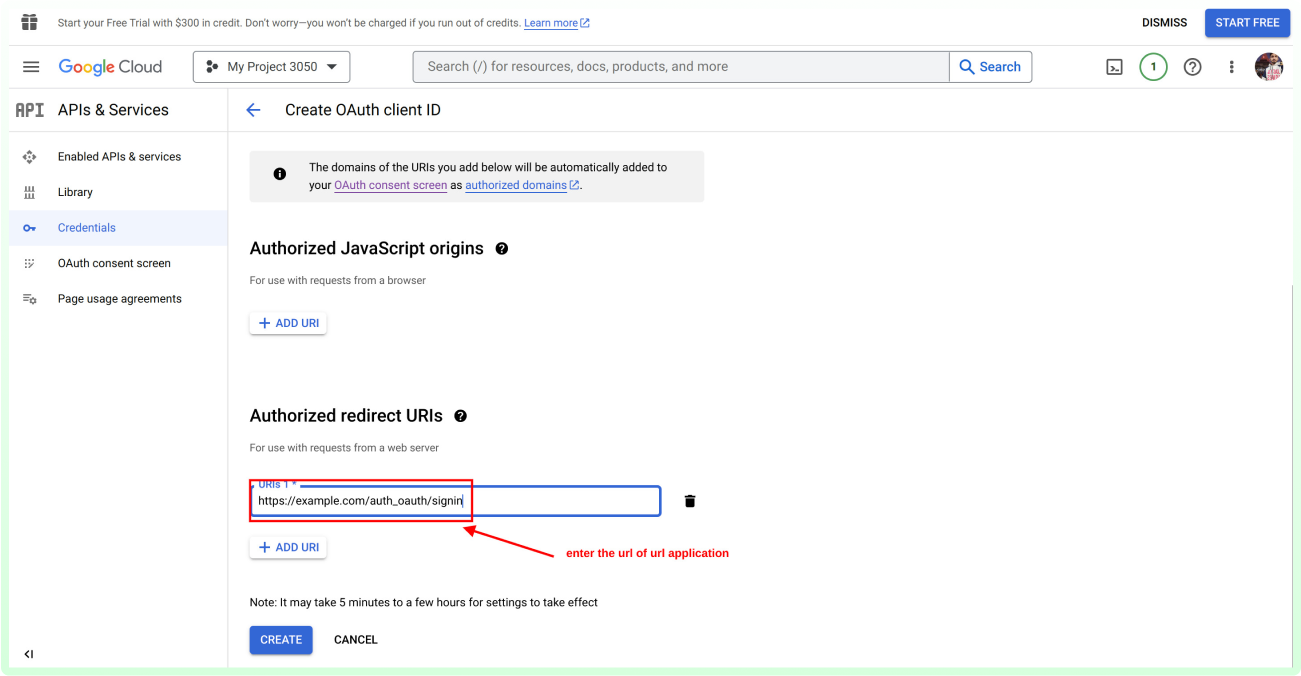
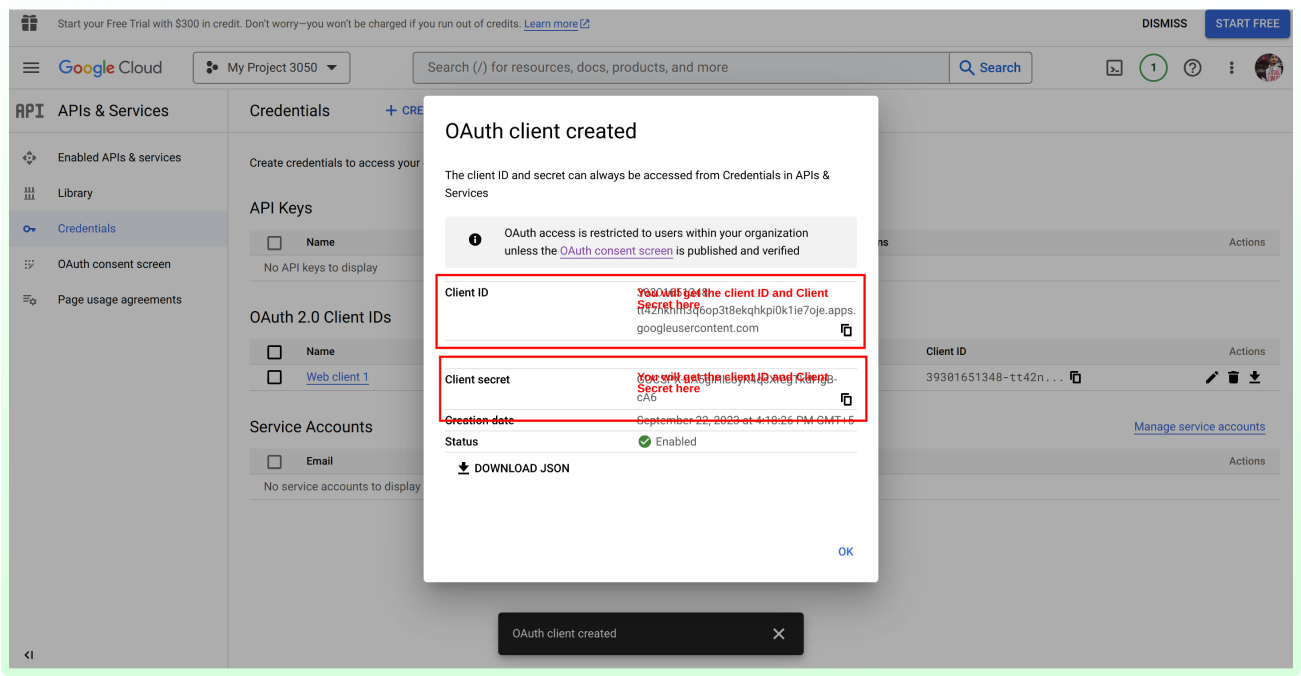
Step 10: After creating the OAuth Client ID, you'll receive both the Client ID and Client Secret for use on the Gmail server.
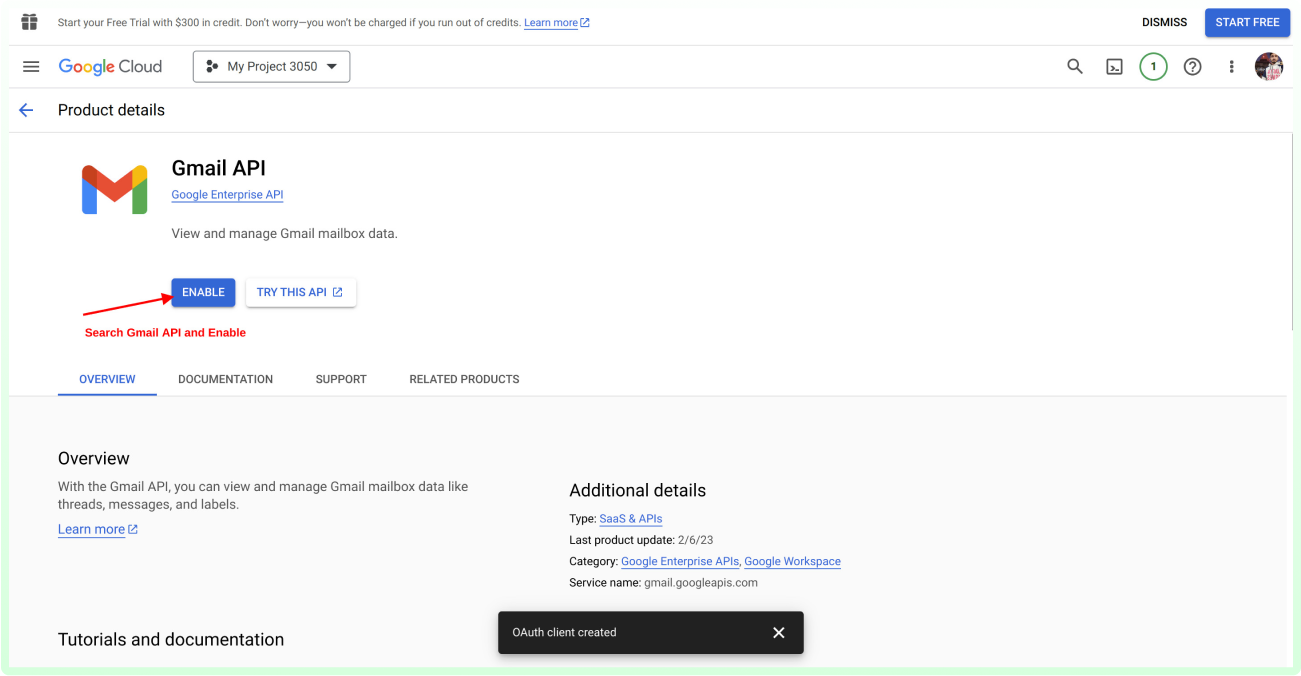
Step 11: Search for the Gmail API and enable it.

Odoo setup
Before Installation: Download the external libraries as mentioned in the requirements.txt file inside the module you downloaded.
Add this configuration parameter in your odoo.conf file to run webhook and you can change values as per your use.
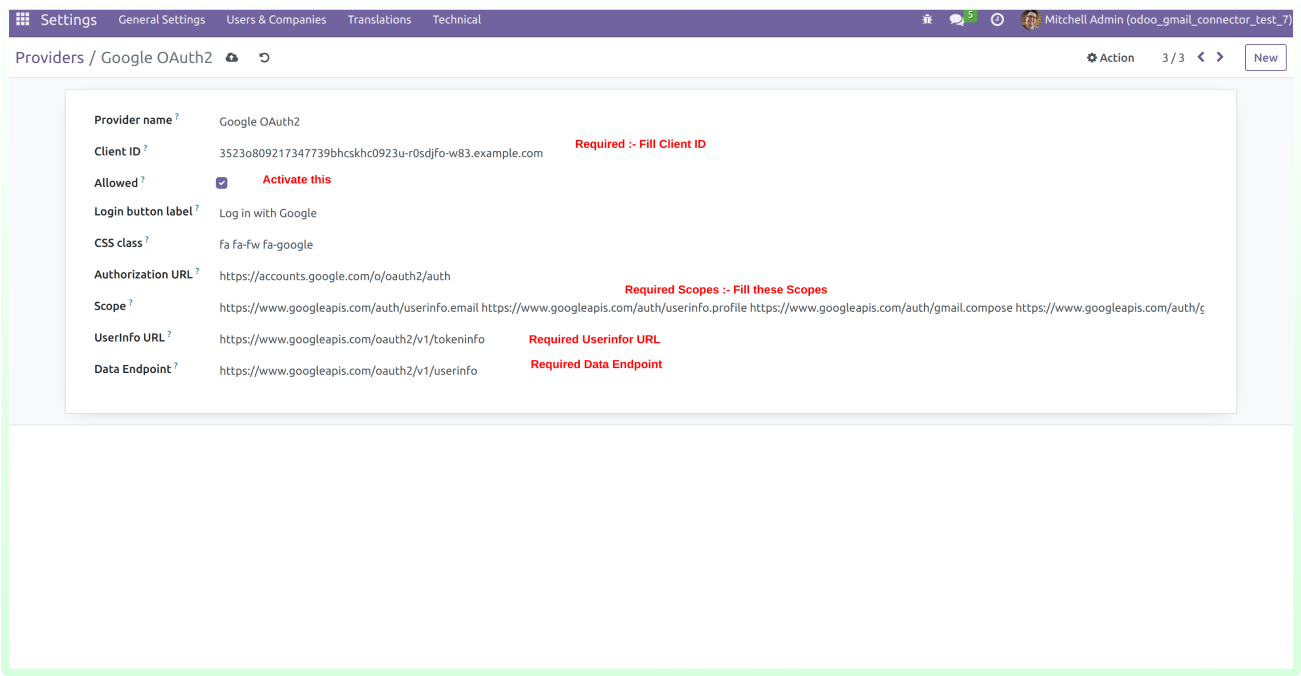
Step 1: After installing Odoo Gmail Connector, Go to the Users &
Companies →Oauth Provider →Open Google OAuth2 record.
Use the client ID that we have created above and the scopes that are
provided.
Use the following Scopes:
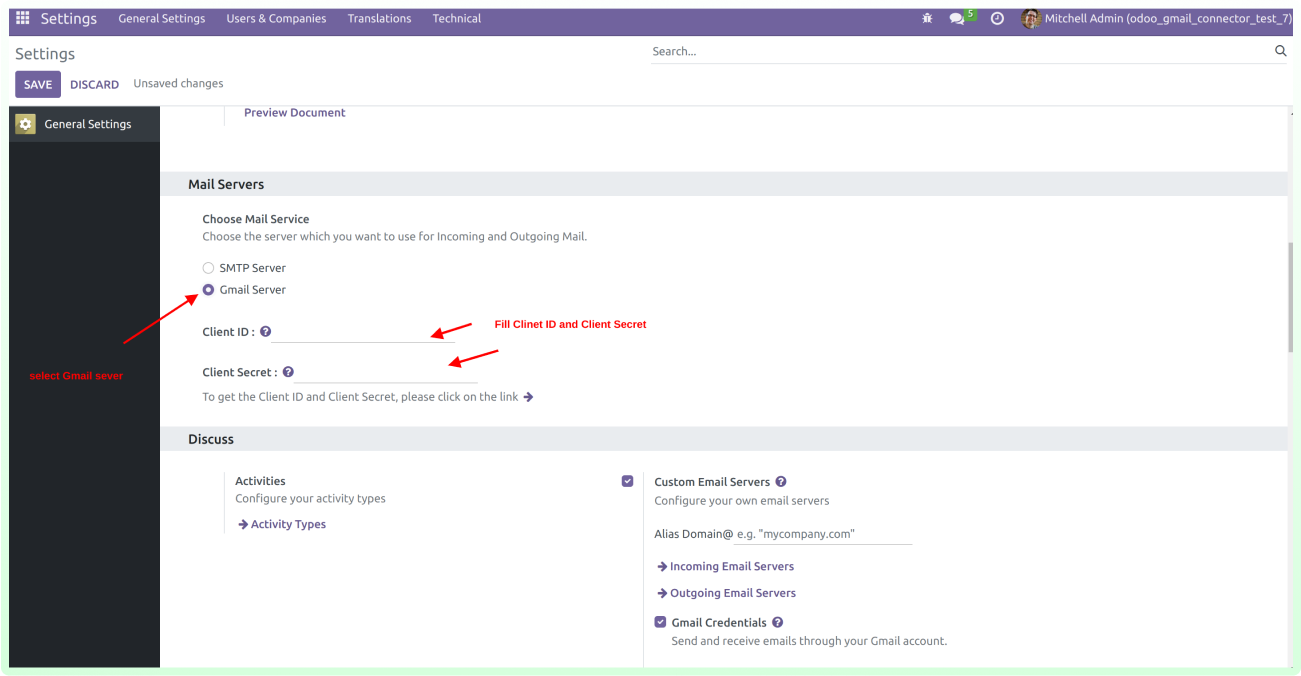
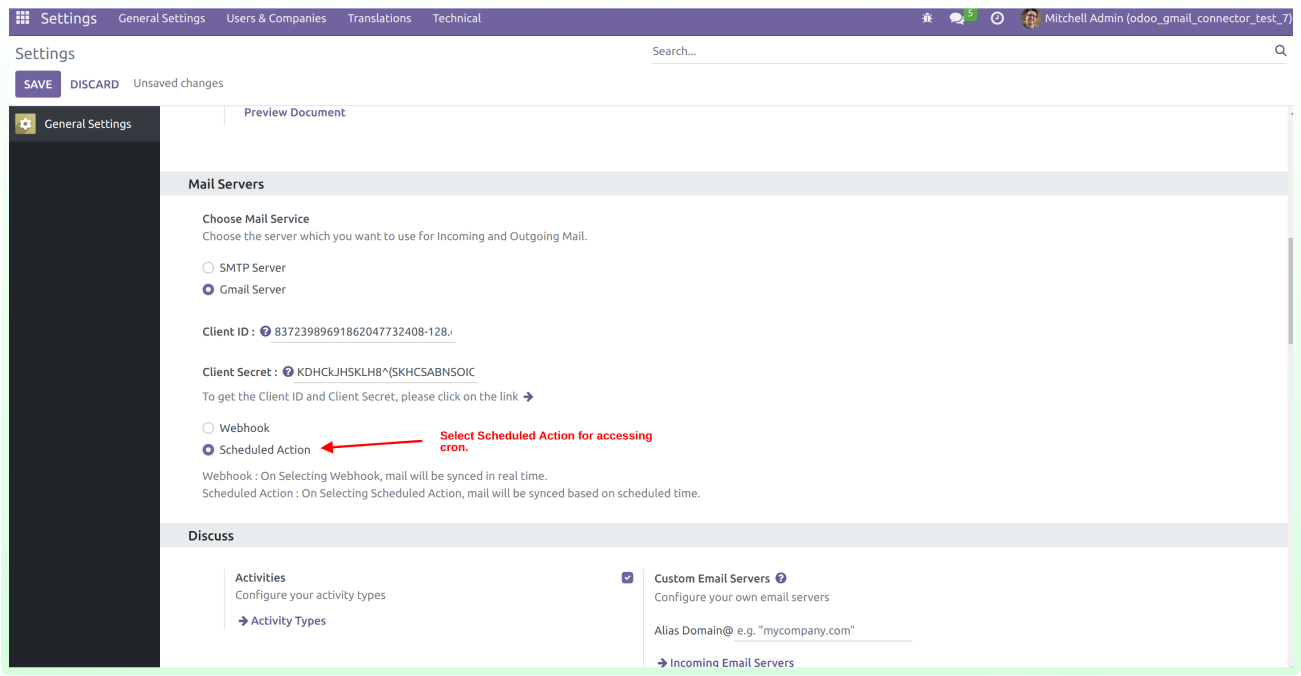
Step 2: Go the general setting, select gmail server and fill Client ID and Client Secret of Google cloud console application, which is create in the above setup.
Step 3: Select Webhook or Scheduled action for receiving server.
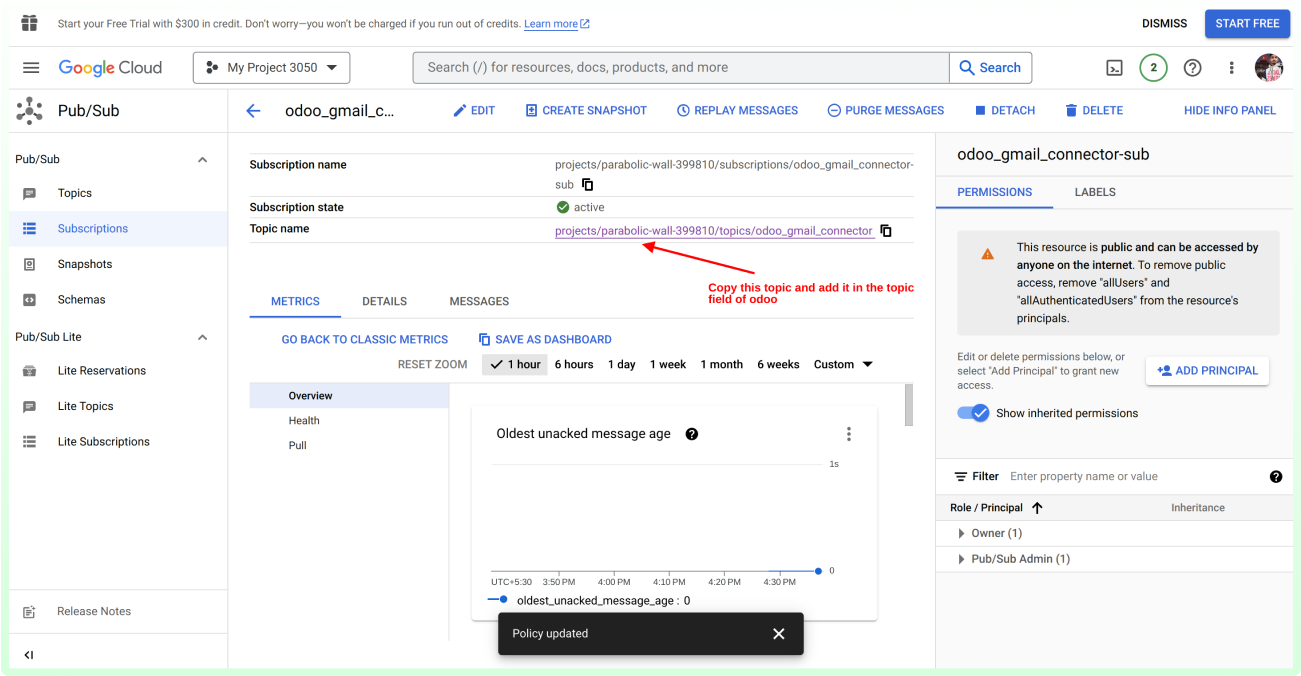
I. If a user selects Webhook, topic is required.
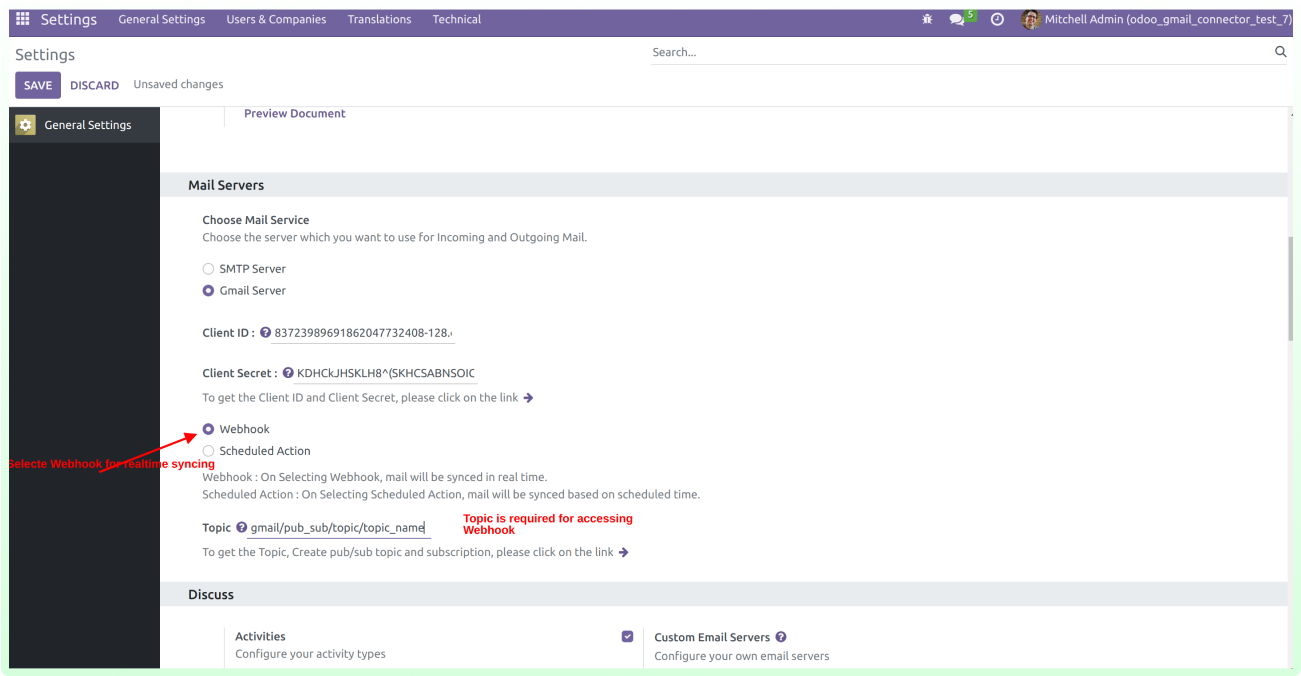
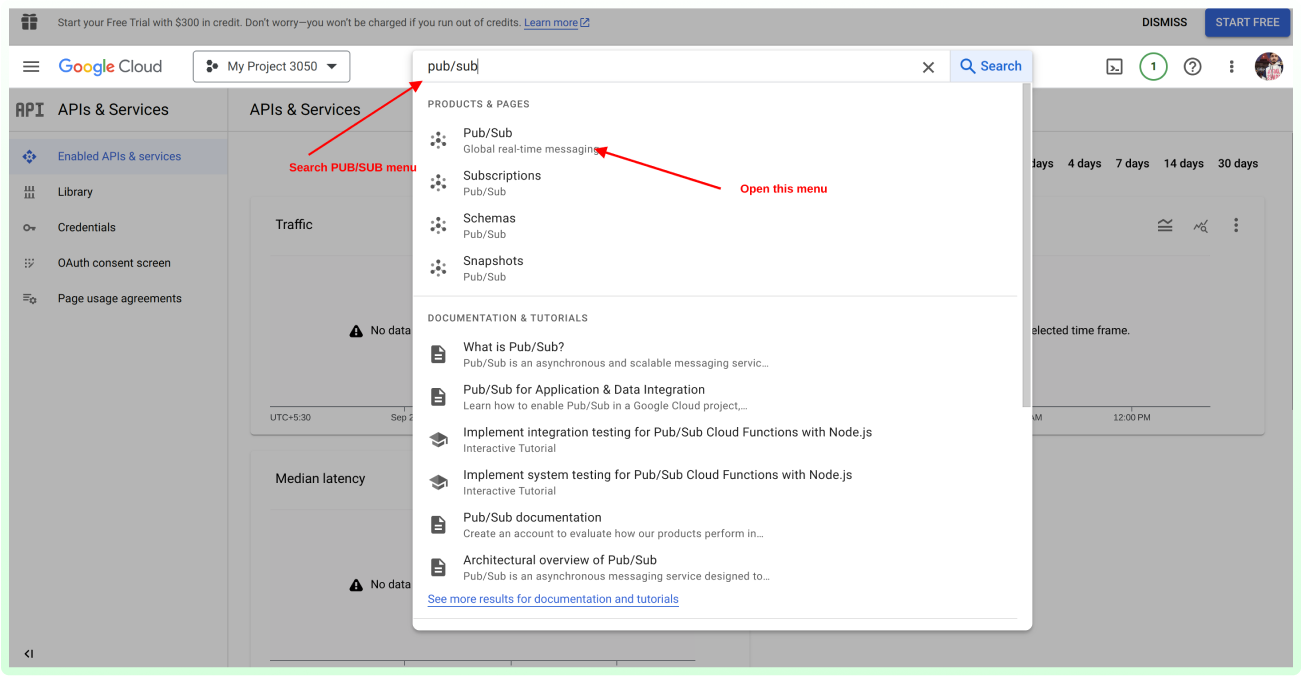
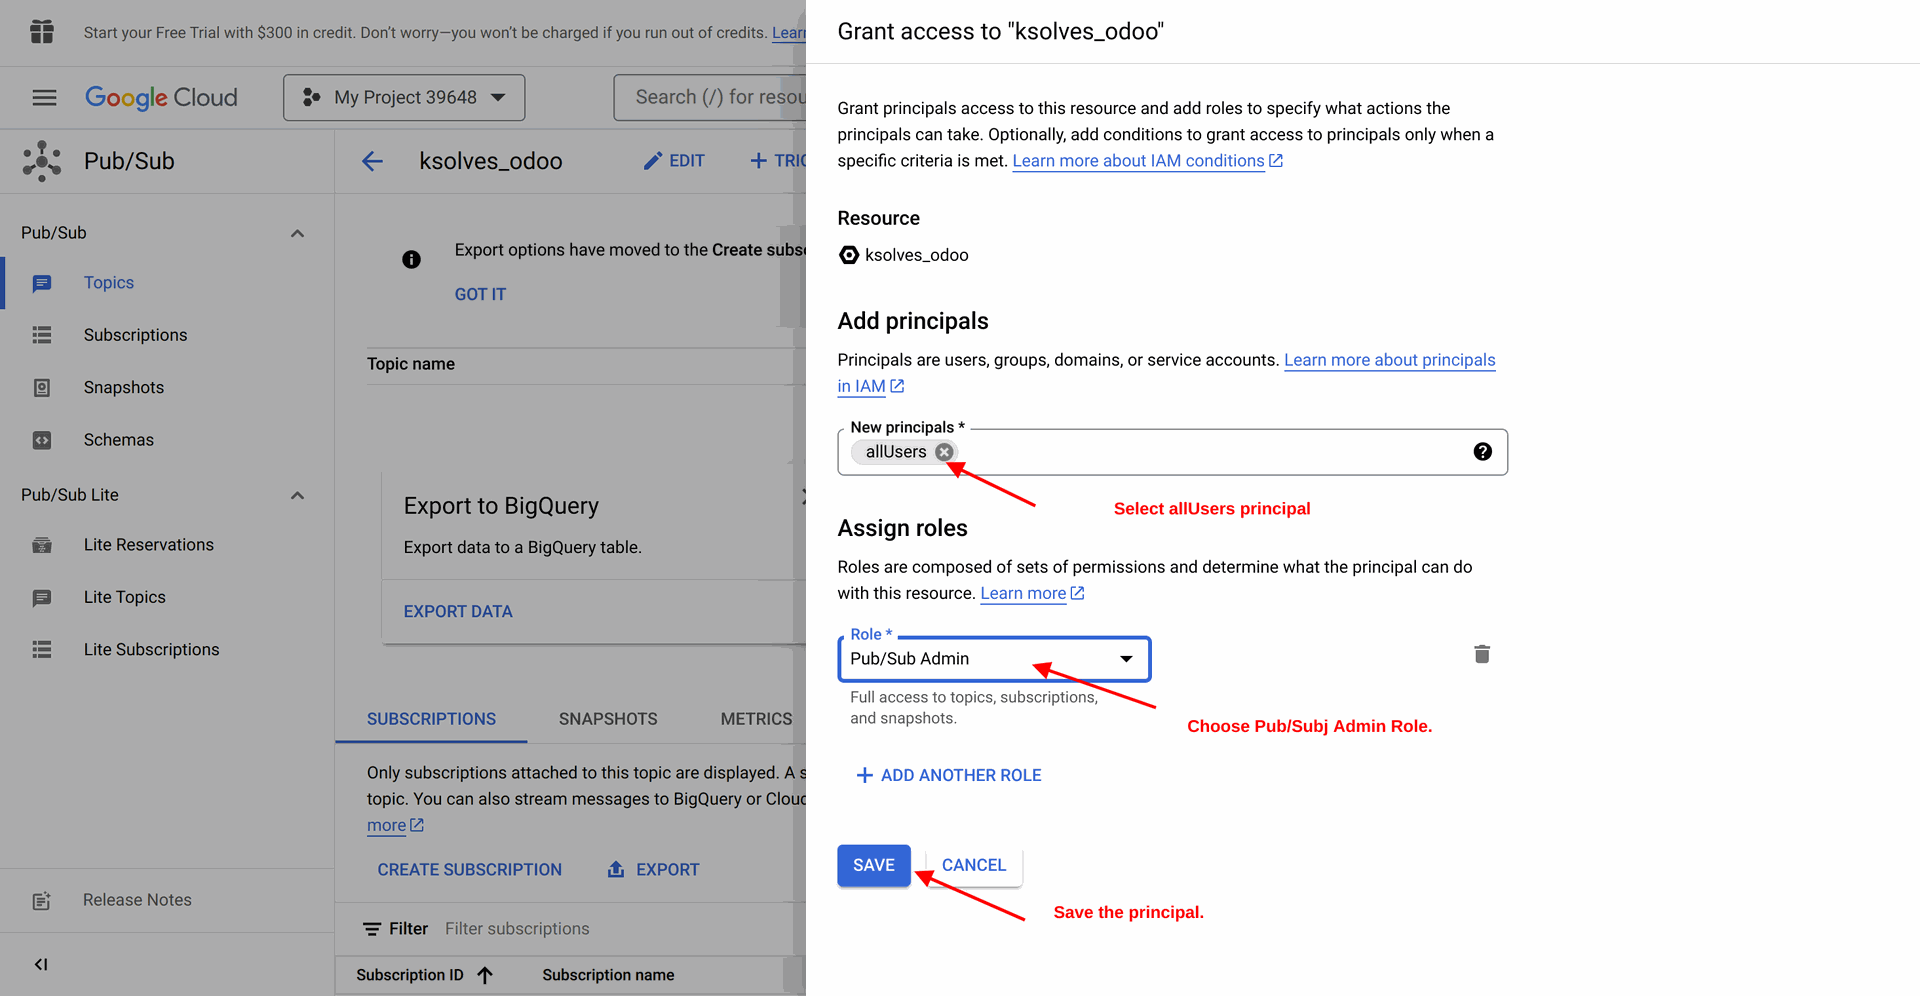
To get the topic go to the: https://console.cloud.google.com/cloudpubsub
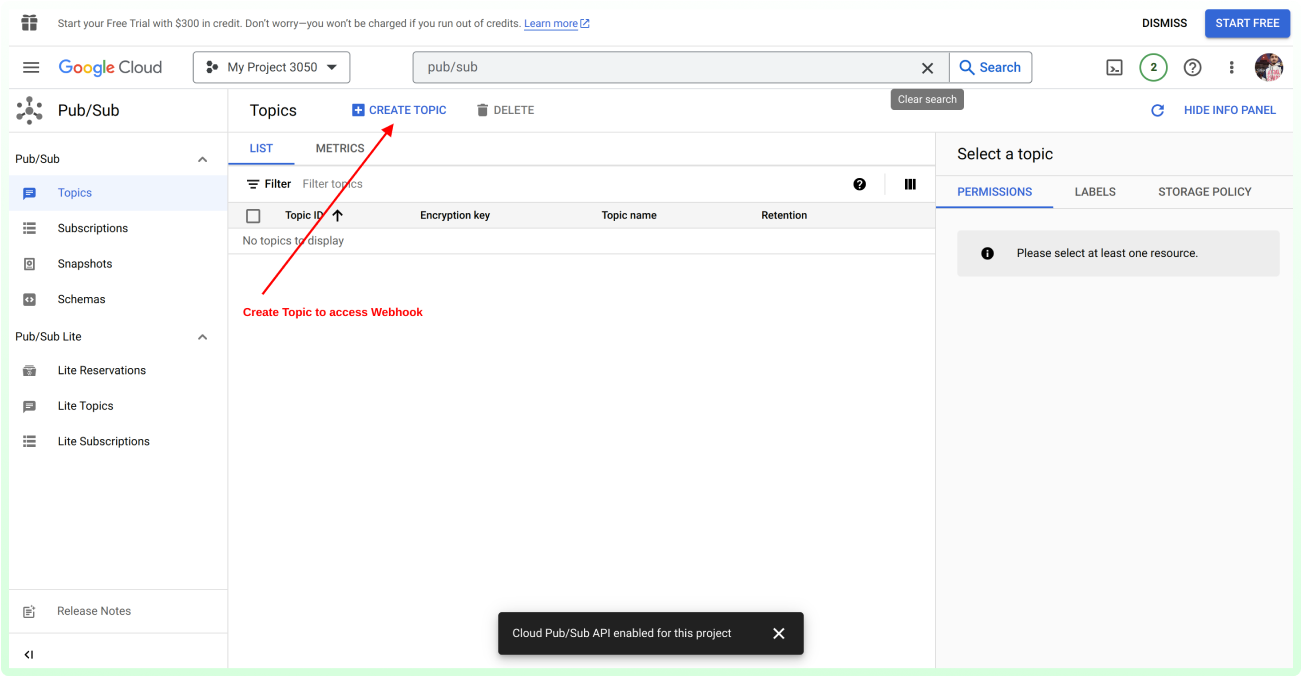
Add principle for all Users permission and select a type pub/sub admin.
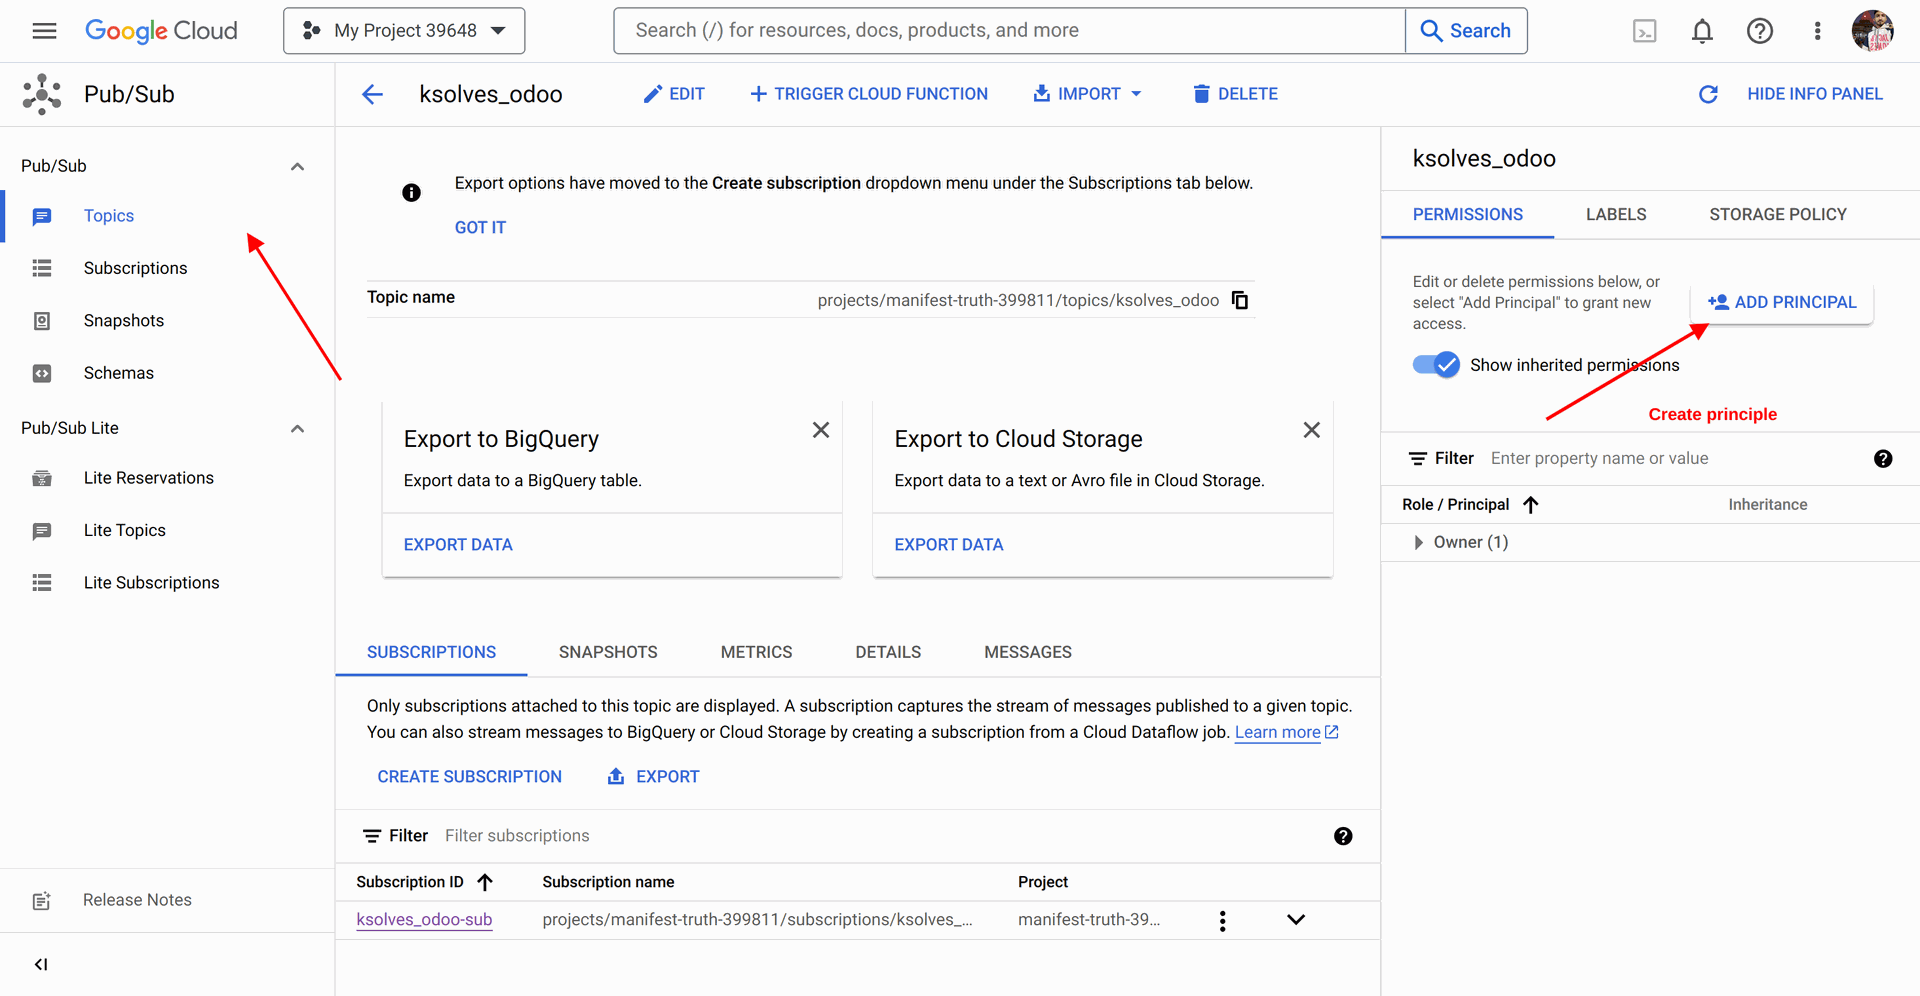
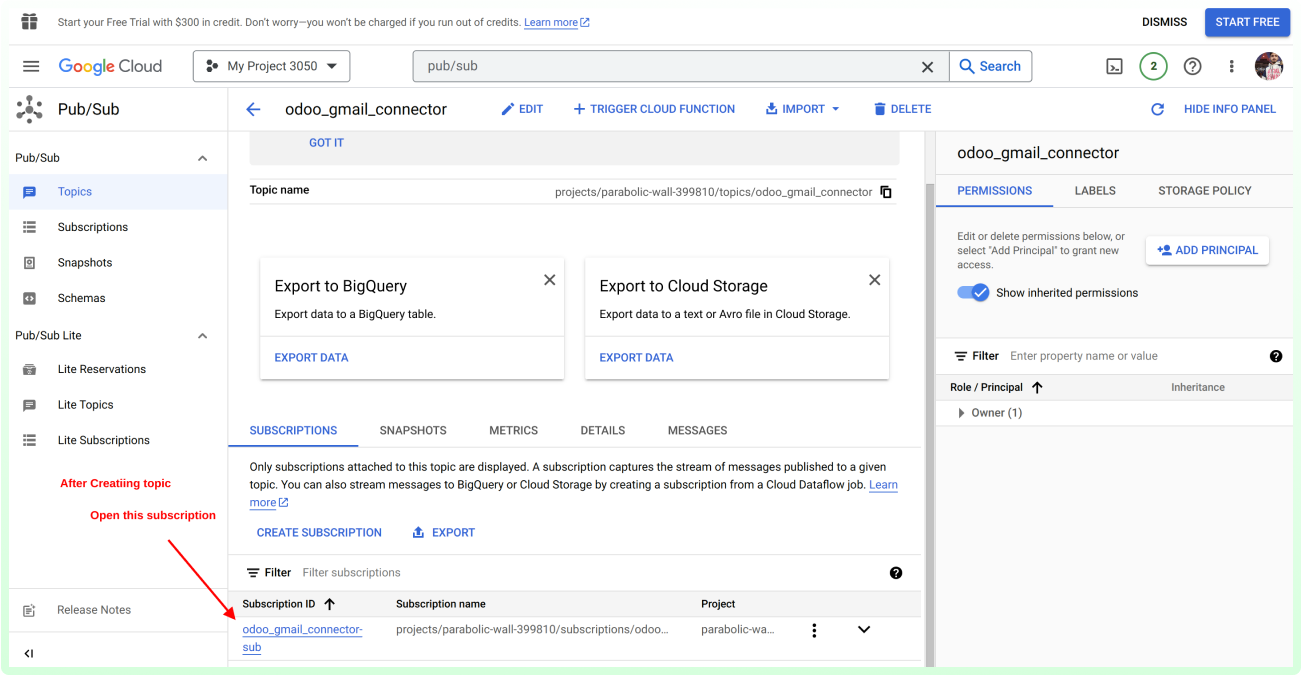
After creating a topic for pub/sub, open a subscription.
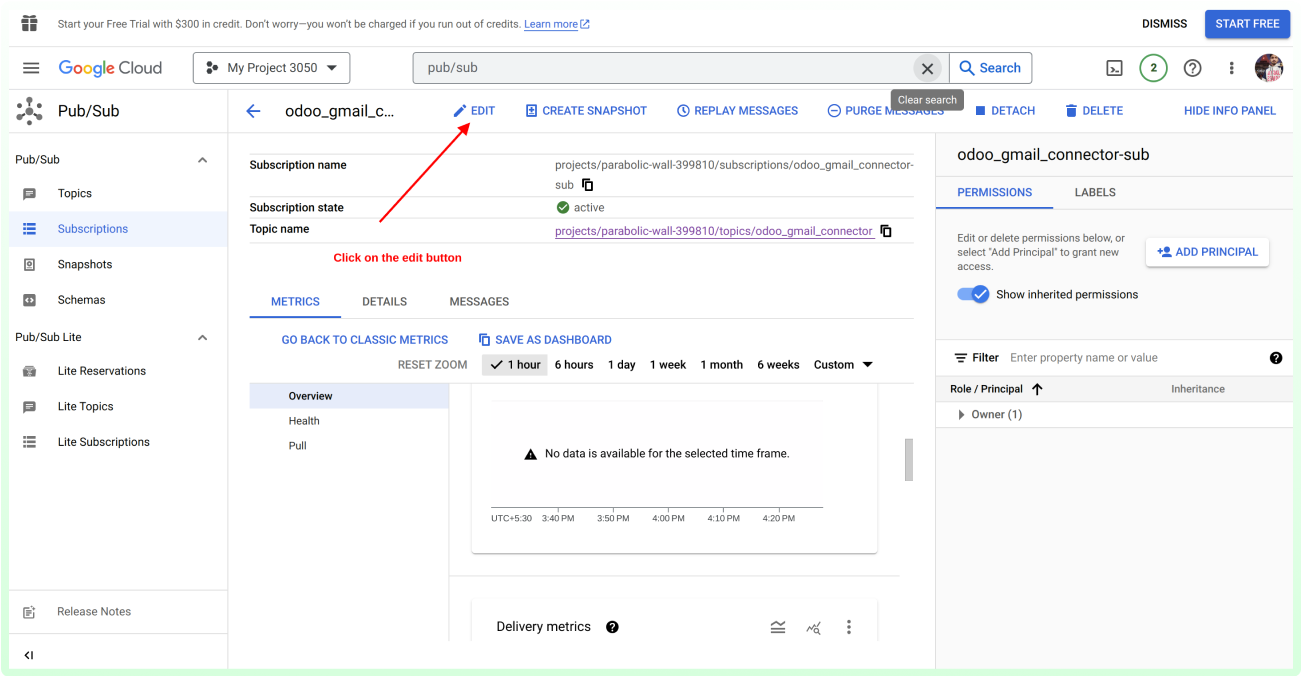
Next, click the edit button to add your webhook link, where the webhook will be triggered when mail is received.
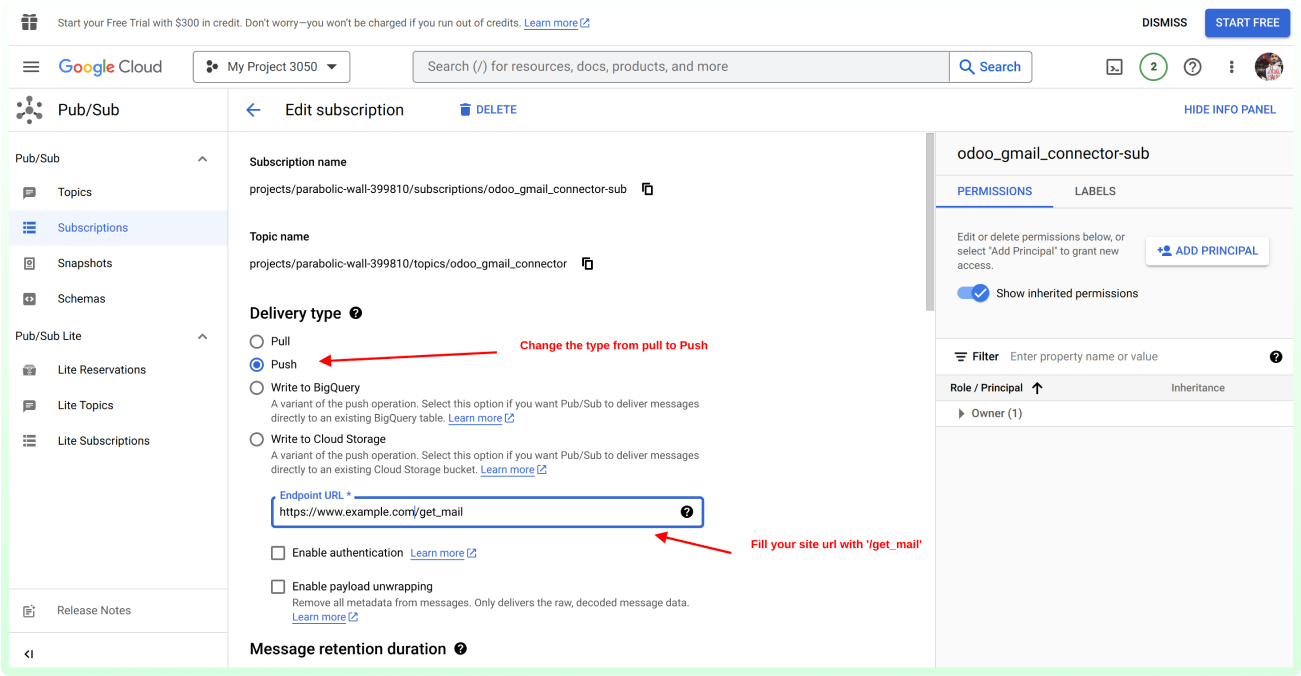
Add your site URL with the ‘/get mail’ at the end.
Scroll down, set the expiration to Never Expire.
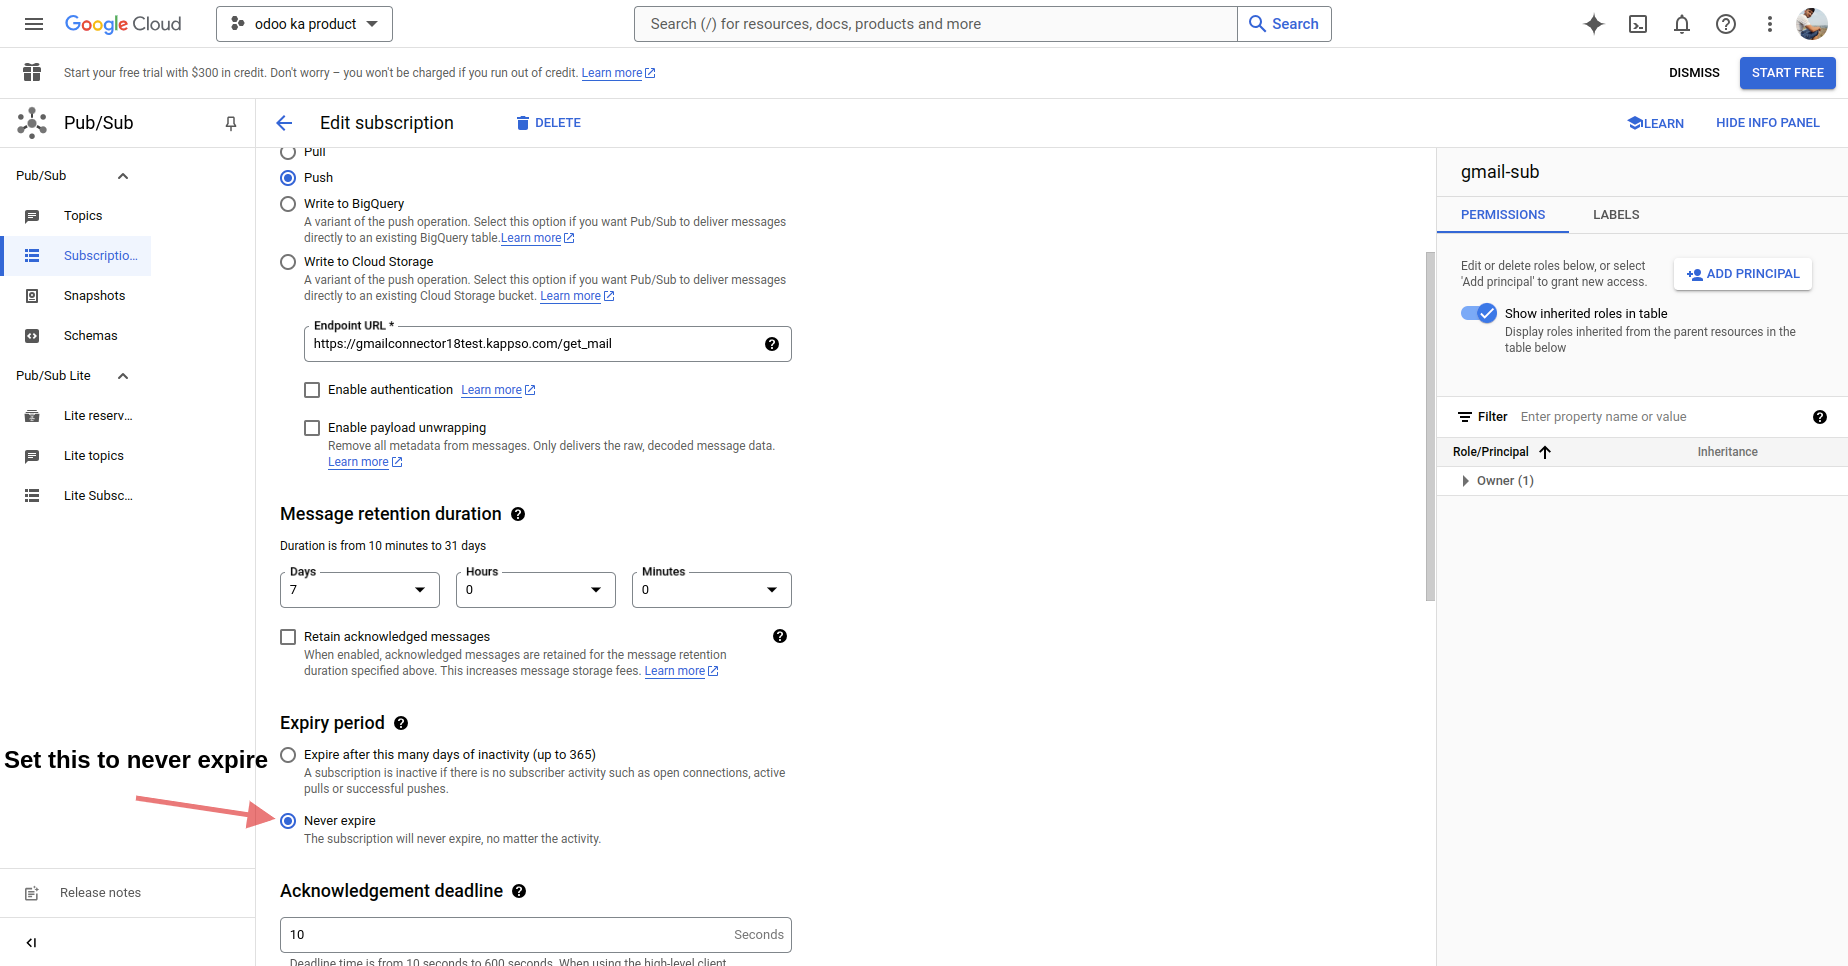
Next, paste the created topic in the topic field of the Odoo Webhook.
II. If you select the scheduled Action, then a cron job will run every 5 minutes.
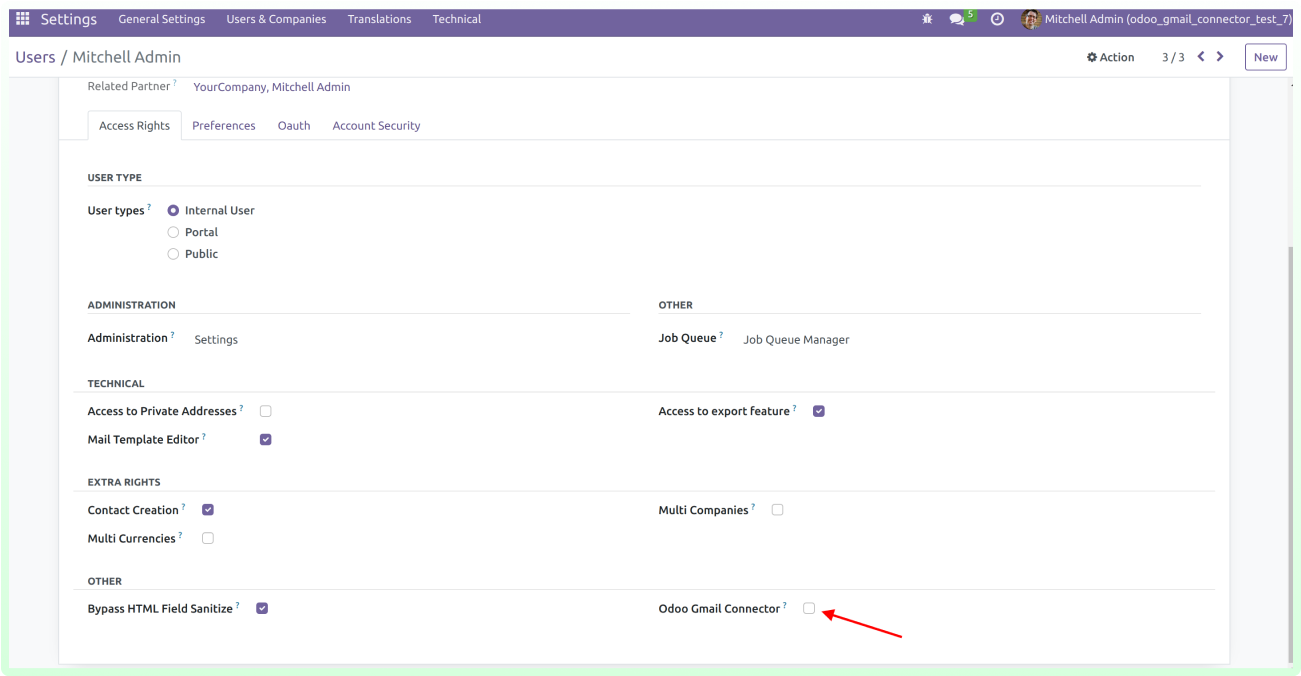
Step 4: Assign the Odoo Gmail Connector group to grant the user access to the Gmail menu.
Why Ksolves
You know us as the
makers of the "Dashboard Ninja",
You
will remember us with Odoo WooCommerce Connecter
Client Success
Invest your trust like our elite clientele did!
Products That Blends Together
Related Products You May Be Interested In!

Dashboard Ninja
|
+ |

Arc Backend Theme
|
+ |

Odoo Gantt View Base
|
= |

Perfect Combo
|
Latest Release 1.0.0
18th october 2024- Latest Release of Odoo Gmail Connector verison 18.


Free 90 Days Support
Ksolves will provide FREE 90 days support for any doubt, queries, and bug fixing (excluding data recovery) or any type of issues related to this module. This is applicable from the date of purchase.
Note Extensively Tested on Odoo Vanilla with Ubuntu OS
Ksolves Suggested Apps

Ksolves Odoo Services

Free 120 Days Support
Get 120 days of FREE support (doubt, queries,
& bug fixing)
on Odoo
applications from the date of purchase. Enhance the functionality of
your business with the Ksolves Odoo experts.
